Have you ever ordered a pint of Guinness at a bar and after observing the bartender’s (hopefully) tedious pouring method wondered what the reasoning behind each step was? When it comes to beer, the ‘nitro’ pour epitomizes the relationship between aesthetics and enjoyment. Nitrogen bubbles are smaller than carbon dioxide bubbles and in combination with the shape of the pint glass they create the cascading effect typical of the pouring method. Luckily for you there is a rhyme and a reason to every aspect of the nitro pour, and after reading this article you’ll be able to suavely explain it to all your chums.
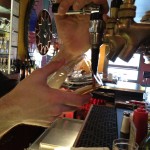
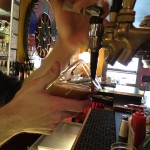
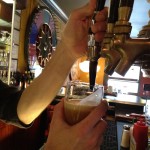
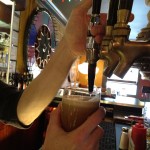
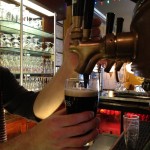
To start, let’s establish a simple breakdown of the steps taken to pour a beer on a nitrogen tap. First, start with a glass held at a 45o angle about an inch below the faucet head and pull the faucet handle forward in a single swift motion1. Fill the glass to approximately ⅔ full2 and then tilt to a 90o angle3 and continue to pour until the glass is ¾ full4. Second, set the glass down and let the beer settle5.
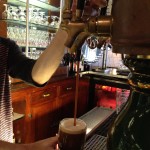
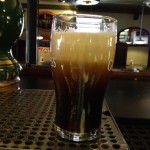
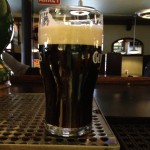
At this point you can see the activity being described in action. The beer will appear almost milky and will start to settle and clarify from the bottom on up. Once the beer has settled out completely6, hold the glass about a half-inch from the faucet head again at a 90o angle7 and push the faucet handle back in a single swift motion. As the glass fills swiftly lower the glass until it’s about four inches further away from the faucet8. Once beer reaches the top of the glass9 set it down and watch the magic10!
So, let us move forward by making a few points. Namely, that nitrogen forms tighter bubbles than carbon dioxide when put under pressure in a solution (and as such, has a different appearance and texture) and that a bubble is a pocket of released gas that becomes trapped inside of a thin membrane of beer. When this is taken into account, the unique aesthetics of the nitrogen pour begin to make more sense. Each bubble has a set surface area that reflects light and there are many more little bubbles in a nitrogen pour. This
explains why we can see the intricacies of the liquid movement in the glass. But wait…why do the bubbles seem to be falling down the sides of the glass when they should be rising? This is where it gets fun…
As we’ve already pointed out, bubbles should be rising in your glass of beer and for the most part they do. Bubbles are pockets of gas being released for one reason or another and then, due to a difference in density, the bubbles will rise through the beer and either culminate in head or burst when they reach the surface. This elementary and seemingly straightforward physical property is the basis for what is about to take place. Gearing up for the pour, the bartender starts with the glass at an angle and holds it close to the faucet head to diminish the degree of foaming that may occur. Now, the faucet is open, the beer is gushing into your glass, and you’re wondering why so much space has been left in the glass and why it has been put right in front of you as it settles. Is this some sort of
tease? A means to whet your appetite for brew? Nope. Indeed, all of these steps play a very important role in the final appearance.
When a beer is poured into a pint glass, the shape of the glass creates a very interesting current that a vast majority of beer drinkers are unaware of.* We’ve already established that bubbles rise in a glass of beer, but what we often fail to consider is the fact that most of the bubbles are generated in the bottom of the glass and even if they aren’t, they’re predisposed to rise to the center as well. However, the typical pint glass slopes outwards as you move up the glass and as a result you end up with more bubbles concentrated in the center of the glass and less on the outside. This means that the outermost layer of beer in the glass, the beer closest to the outside edge of the glass, has a higher density than the bubble-packed beer in the center of the glass. This more-dense beer begins to fall down the side of the glass as the beer is sitting there waiting for you to drink it. The cascading that you observe at this time is the falling beer pulling rising carbonation down with it to create that juxtaposition of movement.
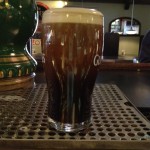
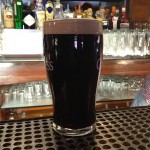
This swirling of beer and gasses will only last a moment, as you will no doubt painfully observe in the drawn out wait for your pint. At this point all efforts are aimed at presenting a beer with maximized aesthetics. In a nitro pour those aesthetics are going to be the juxtaposition of clean piceous black stout at the bottom of the glass and the rich, brown, cascading beer sitting above it. All of this should be found under a rich and creamy head with a single large bubble at the center and slight meniscus of foam that rises just out of the glass. The last few steps are aimed specifically at accomplishing this presentation.
The bartender’s goal in calming the beer is to allow as much carbonation as possible to dissipate while the beer settles, thus creating a more dense layer of beer on the bottom of the glass. Now that the beer has settled out the bartender will raise the glass to within an
inch of the faucet head, push the handle backwards, and drop the glass away from the faucet as the glass fills. This denser layer of beer will serve as a sort of boundary for the less dense beer that has just been introduced and keep the two from blending. Starting the final pour close to the faucet prevents too much air from being introduced during the finish, as this would result in a multitude of small bubbles in the head. Having said that it is also important to point out that slowly drawing the glass away from the faucet ensures that the second burst of beer nearly reaches the bottom and that the cascading effect begins lower in the glass and lasts longer.
The nitrogen draft pour is one of the more alluring and attractive presentations of beer out there and one that will never fail to pique the consumers interest. There is something undeniably intriguing about getting a glass of beer that seems almost alive with activity as you hold it and the childish excitement it generates will never grow old. Now that you know what your next nitrogen served beer should look like and how it should be poured you can regale your buddies or an unsuspecting attraction with this newly obtained knowledge.
By Ethan Johnston
* (University of Limerick study, http://phys.org/news/2012-05-irish-mathematicians-guinness-video.html)

Leave a Reply