 Once you’ve reached a certain point in your homebrewing journey there are only so many horizons left to conquer. All-grain is the only thing you’ve known for years, your draft setup is totally dialed in, you’re involved in a number of homebrew forums, and maybe you’ve even played around with souring microbes. So, what’s the next big project going to be? How about setting that sweet kegerator up to serve homebrew on nitro?! That’s right, you can serve your very own concoctions using the same nitrogen mixture (Beer Gas) that is used to serve Guinness. All you’ll need are a few additional pieces of equipment and a little know-how.
Why go with nitro?
If you’ve ever had a nice milk stout or full bodied porter served on nitro, then you already know that it’s an aesthetic and tactile treat. The cascading effect created by the gas blend is always a sight to behold and the silky mouthfeel that follows just adds to the already delightful experience. If you really want to be able to take it to the next level, then our previous post on the science behind the proper nitro pour is a great place to start.
Having the capability to serve certain beers on nitro is a lot of fun and really gratifying. There is a certain pride to be had in taking the time to put together the system, dial it in, and master the pour. Perfecting a standard draft setup isn’t quite the same, and it’s certainly not as rewarding. That becomes blatantly apparent when you blow your buddy’s mind by pouring him a perfect pint of nitro milk stout…. in your own kitchen.
What do I need?
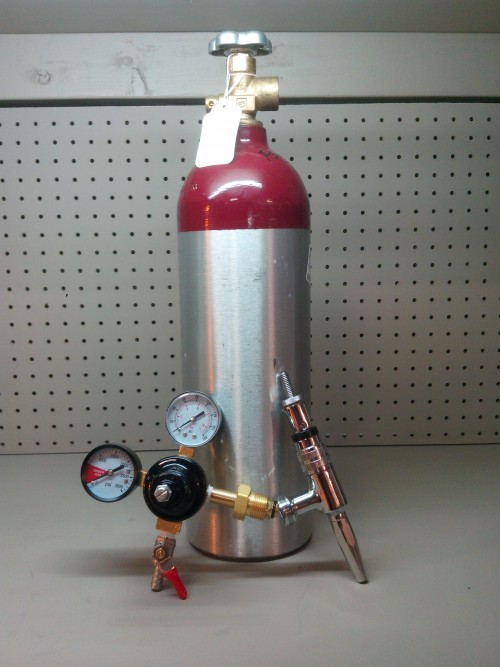
At this point you’ve no doubt convinced yourself that you have to have nitro at home and are wondering what it’s going to take to make that happen. Well, the only three items that are required to serve nitro are a Beer Gas tank, a nitrogen regulator, and a stout faucet.
Beer Gas Tank – Beer Gas isn’t just the few words that you’re able to cobble together the morning after a bender in an effort to explain what your unfortunate partner is smelling. It’s also a blend of nitrogen and carbon dioxide that usually comes in a ratio of 70-75% nitrogen and 25-30% carbon dioxide and can be used to serve delicious beer. The tanks differ from Co2 tanks in that they have a female thread. If you’re looking for Beer Gas, visit your local Fifth Season and inquire about a tank purchase or exchange.
Nitrogen Regulator – A nitrogen regulator is very similar to your standard Co2 regulator and differs in two primary respects. First, a nitrogen regulator has a male thread on the coupling to match with the female thread on the Beer Gas tank. This helps prevent anyone from accidentally hooking up a Co2 regulator. Second, a nitrogen regulator is rated to a much higher pressure than most Co2 regulators and can withstand the higher pressure associated with using a Beer Gas tank.
Stout Faucet – It may seem like the stout faucet is the least important part of the puzzle, but that’s far from the truth. The stout faucet features what is called a restrictor plate and this is an essential component in producing a proper nitro pour. The plate creates a separation of gas and liquid and the resulting agitation aids in the creation of that nitro aesthetic. Also, it’s worth noting that the restrictor plate can be removed and the stout faucet can be used as a standard faucet. This definitely helps justify the purchase of an extra faucet.
How do I use them?
Now that you have all of your sweet new gear, you’ll need to learn how to put it to use. It’s worth considering that everybody’s setup is different and it will undoubtedly take some tinkering to dial this thing in. However, these simple recommendations should make it a breeze.
The first thing you’ll want to do is decide whether or not you’ll want to perform an initial force carbonation with straight Co2 or just start off with the Beer Gas blend. The benefit to starting with Co2 is that you can speed the process up a little by carbonating quickly and then serving with Beer Gas. Starting with Beer Gas is slower, but keeps things more simple. It’s up to you.
If you start with Co2, then it’s important to keep it in the 8-10 psi range, and the recommended initial Co2 pressure is 25% of your final serving pressure (25-35 psi). If you’re starting with Beer Gas, then simply set your psi for 30 and let it sit for at least a week.
Once you feel your beer is properly conditioned and ready to go, hook up your liquid line and give it a whirl. If you don’t have a nice cascade or foamy head, increase the serving psi. If the beer is too foamy, then consider reducing the serving pressure. It may also be worth using a draft line with thicker walls to provide more resistance against the high serving pressure.
The pleasure of serving your first home brewed beer on nitro is just as easy as grabbing the three aforementioned items and putting your newly acquired knowledge to good use. If you have any further questions, please consult with your local Fifth Season or email me at ethan@fifthaseasongardening.com.
Want to learn more about serving draft beer? Check out this resource from the Brewer’s Association!

Clarissa says
I spent a lot of time to locate something similar to this
ashley says
Glad you found us!