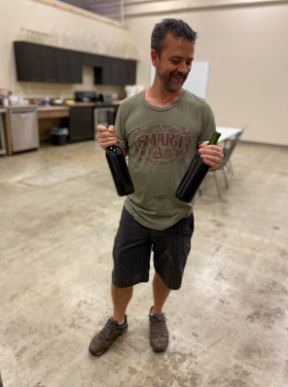
-Mike Weeks-
I recently decided to venture into the world of winemaking because, like many of you, I enjoy pairing a nice glass of wine with dinner and had heard from folks that the kits we carry can make some really nice wine. A customer shared with me that she and her husband once made wine from one of our kits and when her wine connoisseur brother visited, they conducted a test and he named the kit wine as the most expensive and best one in the lineup! I have to say, I was surprised at how easy it was, and so far the wine is excellent without much aging at all.
I opted for the Chilean Cabernet Sauvignon from Winexpert Classic. This kit yields roughly 30 bottles of finished wine from 2.5 gallons of grape concentrate. The kit included a few packets of oak chips and other ingredients that are essential in the fermentation process. I found that the directions were very easy to follow, giving me a solid understanding of what to do on certain days and what to check for before moving to the next step.

If you’re already a homebrewer, it’s likely that you have the equipment needed to make your wine. If not, you’re looking at an initial investment of just over $100 for the equipment. This includes:
- Stirring spoon
- Sanitizer (I used Star San)
- 7.9 gallon fermenting bucket and lid with an airlock
- 6 gallon glass carboy
- Auto Siphon
- Triple Scale Hydrometer
Proper sanitation is key with any brewing or fermentation project, and this is especially true with wine. You’ll want to sanitize everything in advance, from your airlocks to your bucket. After putting the juice concentrate, water, and the oak chips into the bucket, I took a hydrometer reading and recorded it on the instruction sheet. This number will determine the overall gravity of the finished product.
Next, I pitched the yeast and then waited. My initial fermentation was pretty strong for about 4 days, which settled down noticeably from days 5-14. On day 14, I racked (or transferred the liquid) from the bucket to the glass carboy. I knew it was time because the oak chips and spent yeast settled to the bottom bucket. You actually want to get the liquid off of this spent material, as contact will affect the quality of the wine. I took another hydrometer reading to ensure that fermentation was complete and then transferred the liquid over to the glass carboy.
The next step is to de-gass the wine, which is a process of briskly stirring the contents inside the carboy for 10 minutes, occasionally switching directions. Once I completed this step, I placed the carboy in a dark place for another day and then stirred in the chitosan, which is a clearing agent that gloms to the solids and makes them precipitate to the bottom. This was another step that took a couple weeks.
Last, I bottled the wine using my auto siphon and Easy Double Corker. I snuck a taste at this point and was pleasantly surprised by the complexity of flavor.

The nitty gritty: The kit I used cost $87 which means my finished product cost about $4 per bottle (including bottles and corks). If I’d needed to purchase equipment to get started, this would have gone up to about $7 per bottle but that’s still cheaper than almost anything I’d be willing to purchase in the store. So, it’s really good wine at a fraction of the cost! Plus, now I can stock my basement (which I wouldn’t go as far as calling a cellar) for when we gather with friends instead of having to run to the store – convenience! I also plan to give some for holiday gifts, and it is always better to DIY than buy! I’m sold and look forward to trying some other varieties. There are some great tips online for improving your wine kit even further with simple additions.


Leave a Reply