-Jonas Hill-
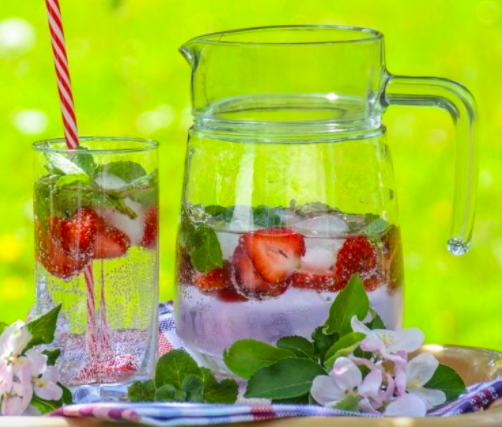
Over the past few months, the home soda maker supply chain has taken a hit. Large, centralized processing facilities in populous areas have seen their home soda canister output drop as necessary measures are taken to ensure the safety of the workforce and general public. That said, folks love their soda, and it’s a great refresher during these hot summer months after a long day in the garden. Stay hydrated and ‘in bubbles’ with this helpful explainer on a simple DIY home soda tap setup so you can always have carbonated water.
Homebrewers or folks interested in brewing – stay tuned! This kegging setup can also be used to free you from time-intensive beer-bottling days.
GETTING READY: Gathering equipment and supplies.
To get started with your own soda tap setup you’ll need to acquire a few items. Naturally, Fifth Season offers all of the gear, supplies, and ingredients you might need (aside from a refrigerator). We also offer turnkey kegerator setups for sale on our website if you’d like to skip the steps below, but that isn’t necessarily a low-cost option.
Here’s a list of items you’ll need for your own basic home soda water and kegging setup:
- A new or used refrigerator large enough to contain your serving keg and CO2 gas tank,
- a source of good-tasting clean drinking water,
- sanitizer,
- one ball or pin lock keg and the accompanying liquid and gas disconnects,
- one dual gauge regulator with a single shutoff and a CO2 tank,
- gas and serving lines and a picnic dispensing tap, and
A new or used refrigerator. Refrigerators have a pretty decent lifespan as far as home appliances go (15-20 years), and when something does go wrong, usually it can be repaired fairly inexpensively. Maybe you have one sitting in your garage collecting dust, or your neighbor does. If the wiring is in good shape and the compressor runs (it gets cold), plug it in and clear out room for this setup by removing any shelving or drawers inside.
A good source of drinking water. Avoid using previously bottled water to keep your setup more sustainable and less expensive. Save money by not over-filtering your water. For municipal or city water that already tastes okay, charcoal water filters with garden hose-type fittings can be used to help improve the taste, smell, and clarity of your finished soda water. If it already tastes okay and is safe to drink, this is all you’ll need. Filters that offer removal of bacteria, protozoa, viruses, heavy metals, or toxins aren’t necessary here thanks to the heavy lifting done by your upstream water treatment facility. If you’re interested, find a copy of your local municipality’s water assessment online with a quick search to get a better understanding of your local water quality. If you’re on a well or are using a natural water source – disregard this, you may need to filter or treat your own water more aggressively.
Aside/margin note: Did you know that the first sparkling water was sourced from mineral springs and was naturally carbonated? Carbonation was used as evidence that water marketed for purchase miles from a mineral source was authentic, safe to drink, and untainted. Try your hand at recreating your own version of a favorite mineral water from another part of the world by exploring this resource: https://www.ediblegeography.com/how-to-clone-mineral-water/.
Sanitizer. Clean all of your water-contacting surfaces and vessels using an acid-based contact sanitizer, like StarSan.

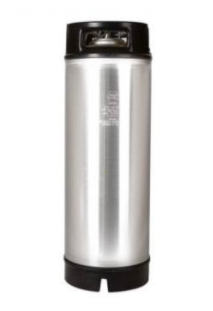
A keg and the accompanying liquid and gas disconnects. Kegs come in a variety of shapes and sizes. Refurbished 5 gallon Cornelius ball lock- or pin lock-type soda kegs distributed for years by Coca Cola and Pepsi are go-to items for the home kegging setups, and are fairly inexpensive. Don’t purchase a keg unless you have verified that it holds pressure – most homebrew shops (including Fifth Season) will pressurize their refurbished kegs before stocking them to signal to customers that they hold pressure and won’t leak. Beware purchasing a keg without first confirming that it holds pressure.
Liquid and gas disconnects for ball lock- and pin lock-type kegs are used to connect your keg to gas and serving lines. You’ll need one of each per keg in your setup.

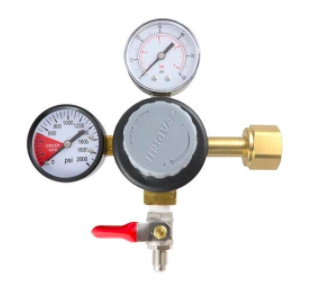
A CO2 tank and a dual gauge regulator with single shutoff valve. This is the heart of your home soda setup – the pressurized gas dissolves into the kegged water, producing a refreshingly sharp, sparkling beverage. The gas also provides the pressure necessary for serving the soda once carbonated. Your regulator is specifically designed for use with a CO2 tank like the one you’ll be using for your setup. The regulator attaches directly to the gas tank and reduces the pressure in your gas line and keg to a maximum of 60 PSI, and is adjusted by turning a knob. The regulator has two dial gauges – the gauge that is pressurized by the CO2 tank has a high pressure range and displays the pressure of the CO2 tank (this can be read to indicate how much gas is left in the tank). The second gauge shows a reading of the pressure being supplied from the tank to the keg and serving lines – this is where max pressure is limited to 60 PSI. The high pressures are great for speeding up the carbonation process, but you’ll probably want to knock the pressure back to 30 PSI (or lower) for serving your soda water and maintaining the right level of carbonation.

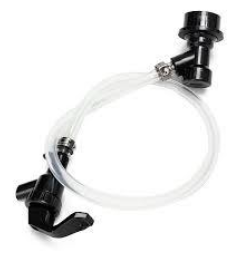
Gas and serving lines, a picnic serving tap, and hose clamps. Fifth Season offers thick walled vinyl tubing suitable for connecting a gas line from the regulator to the keg, and thinner walled tubing to connect to the keg outlet and serving tap. Make sure that all lines are tightly secured to barbed male hose fittings using screw-tightened metal hose clamps to avoid leaks. Any threaded male fittings should also be taped with teflon tape to avoid binding and leakage over time.
ASSEMBLY AND CARBONATION: Make your own fizzy water.
Once you’ve acquired the necessary items on the list above, it’s time to assemble your home soda setup. Follow these instructions and you’ll have a long-lasting supply of refreshing, clean sparkling water in no time.
- Plug in your refrigerator and begin cooling it down. Your soda will chill and carbonate quicker if you cool your system down ahead of time.
- Sanitize your keg, serving lines, fittings, and refrigerator. Following manufacturer instructions, make a dilute sanitizing solution using a concentrated product like StarSan, or IO Star. It’s a good idea to make your sanitizing solution in the keg you intend to use for pressurizing the soda, and then dip your fittings and tubing into the solution. Save some sanitizer in a spray bottle for future use, then empty your keg and set aside on a clean surface to dry.
- Once your keg is dry, fill with your clean drinking water of choice, leaving approximately one gallon of headspace for faster carbonation.
- Ensuring that the CO2 tank valve is completely closed, connect your regulator to the tank snugly using a large adjustable wrench. DO NOT ATTACH THE REGULATOR WITHOUT FIRST ENSURING THAT THE MANUFACTURER-SUPPLIED PLASTIC WASHER IS IN PLACE BETWEEN THE REGULATOR INLET AND TANK OUTLET. Tightening the regulator onto a tank without a washer could lead to a damaged regulator fitting. Make sure that the pressure regulator valve is completely closed at this time.
- Attach your heavy-walled high pressure tubing (4’ should do the trick in most cases) to the barbed fitting on your ball lock or pin lock gas disconnect using a screw-tightened hose clamp. Attach the other end to the barbed clamp on the regulator outlet, also using a hose clamp.
- Attach your regular low pressure tubing (again, 4’ should do the trick in most cases) to the barbed fitting on your ball lock or pin lock liquid disconnect using another hose clamp. To the other end of this tubing, insert the barbed picnic tap fitting and tighten it with a hose clamp.
- Place your filled keg and CO2 tank (with attached regulator) in the prepped refrigerator making sure that gauges are visible, valves are accessible, that the gas inlet of the keg is oriented closest to the regulator, and that the liquid outlet of the keg is oriented closest to the refrigerator opening. Orienting things this way will make things a bit easier to access, operate, and maintain.
- Attach the gas disconnect fitting from the regulator to the inlet on your Cornelius keg, and the liquid disconnect to the keg outlet. Ensure that the fittings are properly and tightly seated. Keg lube can be applied to the male fittings to make for a smooth fit with a leak-tight seal.
- Double check that all of your fittings, clamps, and connections are well-seated, secure, and leak-tight. Make sure that the gas supply running from the gas tank to the keg is rated for high pressure, and that all valves are in the closed position.
- To pressurize your keg and start the carbonation process, open the CO2 tank valve completely. You’ll see a reading on the regulator’s high pressure gauge indicating that the tank is full and ready for use in your kegerator.
- Slowly open the regulator valve, gradually increasing the keg pressure. The pressure of the keg is indicated by the second regulator gauge. To make soda water, open the valve until the gauge reads at least 30 PSI.
That’s all there is to it! Once the keg is pressurized and the water is carbonated and cold, your soda is ready. It’s truly a blank, fizzy slate for whatever beverages you’d like to try for cooling down this summer. Add it to cocktails, or stir in infused homemade simple syrups for easy homemade soda (check out this recipe for an easy blood orange syrup: https://www.epicurious.com/recipes/food/views/blood-orange-syrup-102898).
If you’re interested in your own DIY home soda setup or purchasing a new-in-box turnkey kegerator, reach out to Fifth Season. We offer the necessary equipment and supplies to get started, and the knowhow to make your project a breeze. Come into one of our stores or call and ask for help any time (curbside and contactless services available), or place an order online with us.

Leave a Reply