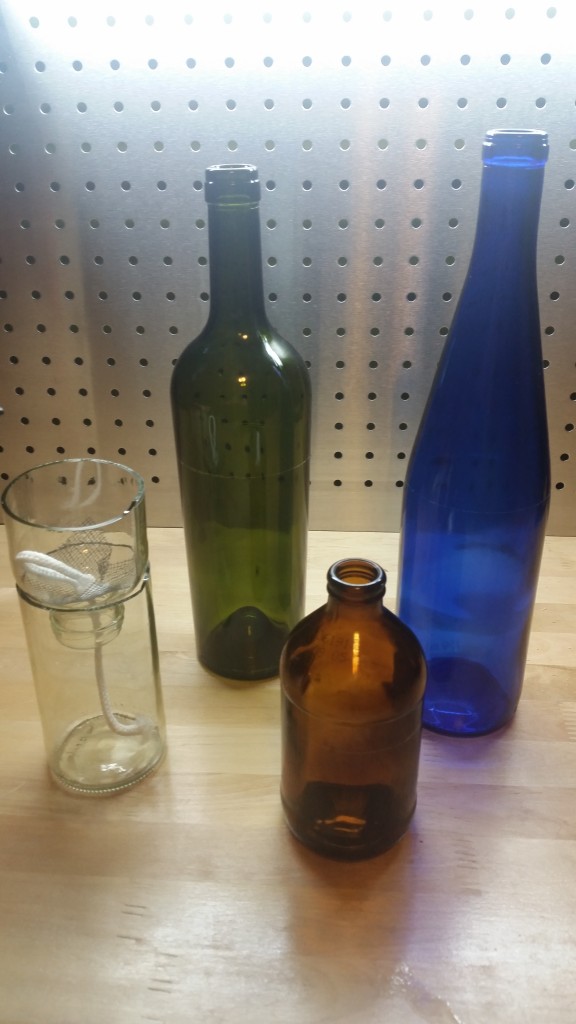
 At Fifth Season, we hear about and see all sorts of cool DIY projects, A couple years ago I came across bottle gardening, and recently I tried my hand at it. These gardens can be as simple as one bottle inverted on itself, or as elaborate as a window-sized unit with stacks of suspended bottles, linked by a drip system and all fed by submersible pumps. At this point, you might ask – why a bottle garden? Well, many people, such as those in apartments or other small living spaces, don’t have access to an outdoor gardening space, but would still like to grow some fresh produce. When there isn’t as much horizontal space for growing plants, it makes sense to grow vertically, and bottle gardens allow for that. Alternatively, bottle gardens can be used primarily for their aesthetic beauty. Lastly, they are a convenient way to grow herbs year round, right on your windowsill. In this blog, I plan to show the jig that I made, a brief explanation of how I use it, how to plant up the containers, and lastly some future projects.
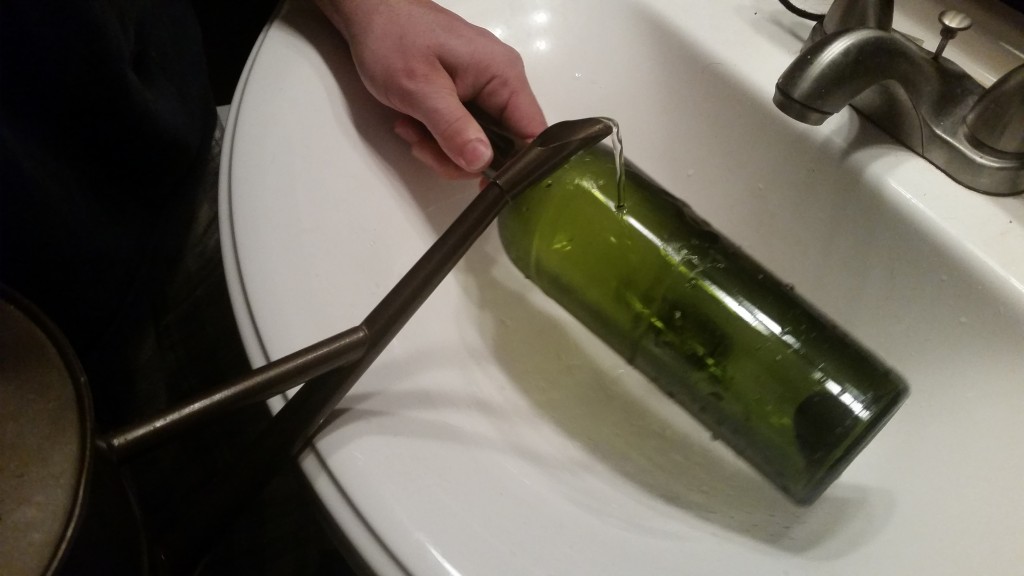
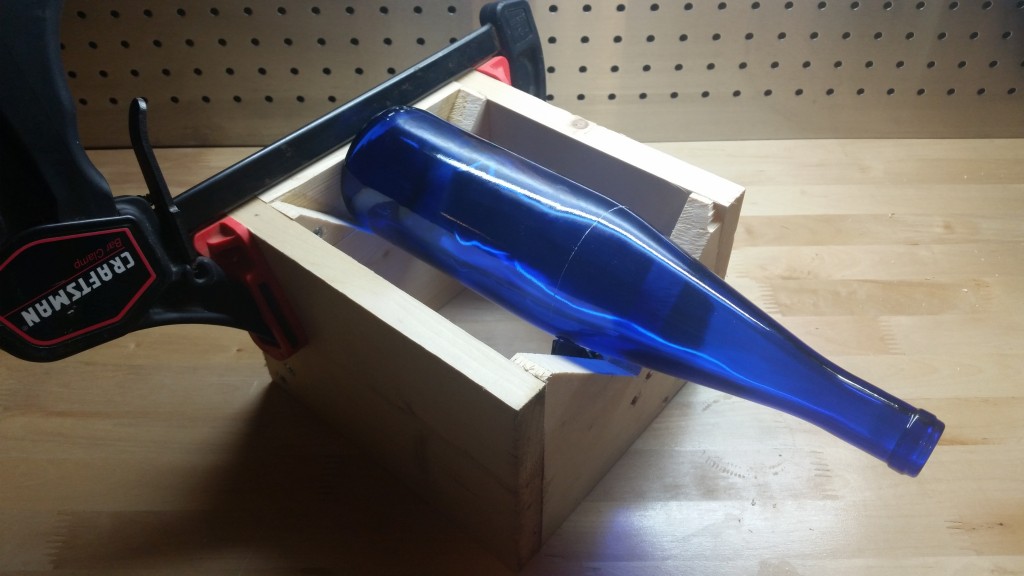
Honestly, I spent too much time looking for the perfect bottle cutting tool. Eventually, I used the one I found here as the inspiration for one I made myself. I wanted mine to be able to cut various sized bottles, but you can see that it otherwise looks basically the same as the tutorial model. Cutting a bottle takes just a few easy steps, and is really more a process of controlled breaking. First, score it, by placing it on the jig and rotating it on the scoring tool. Next, boil a pot of water, and fill a bucket with cold water. I used a metal watering can to pour the hot water over the score line. Once heated, dunk the bottle in the bucket of cold water. Patience is key, as it can take several turns of hot and cold for a bottle to finally fracture along the score line. The longest bottle took less than ten minutes to “cut”. Afterward, some sanding along the edge is required, but the hard part is done, and we are ready to plant.
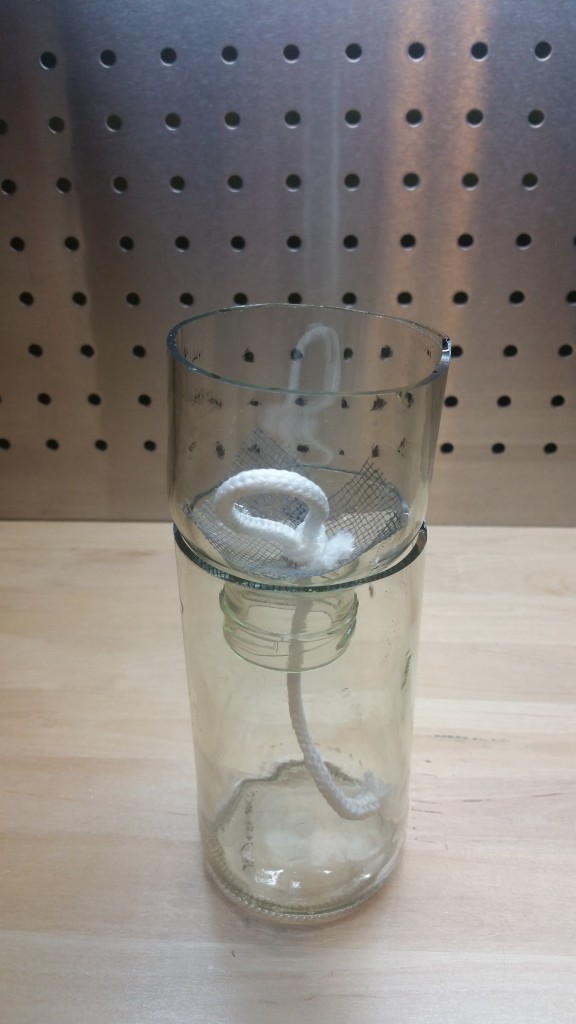
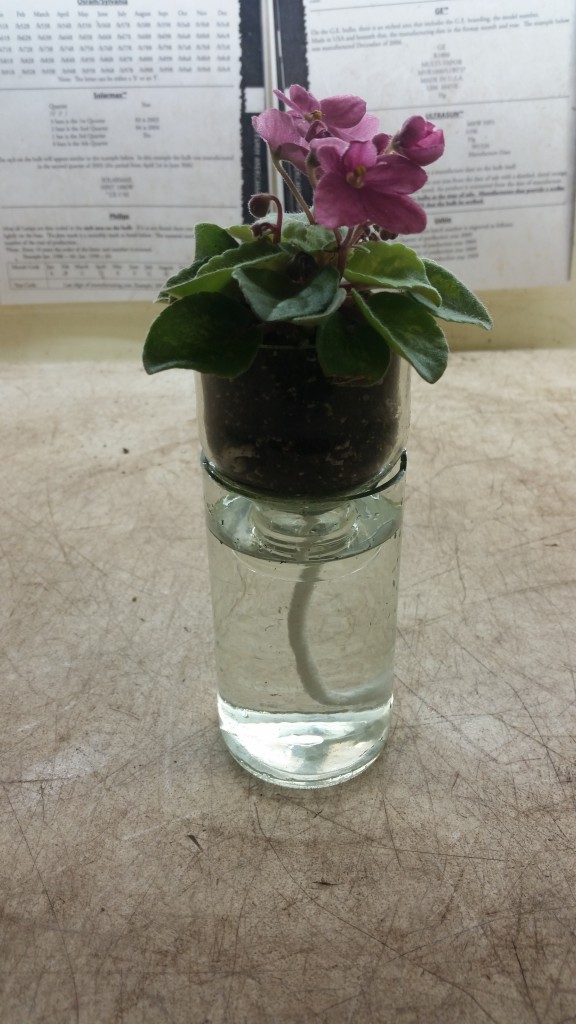
One of the wonderful things about these bottle gardens is that there are several ways to set them up. For example, african violets can be grown in soil with a wicking system, greens can be grown in a drip system, or orchids can be grown in a passive hydroponic setup. Who says hydroponic systems can’t look pretty? For all of these, cut a small square of mesh screen, which will be used to prevent the root zone media from falling into the reservoir. Unless making a complex drip system, you then cut a length of wicking fabric to draw nutrients from the reservoir to the planting media. This can also be done in a passive hydro system to help young plants. Another option, which requires only half a bottle, uses a net cup, to hold the media, placed inside the bottle. For this type of setup, water is filled to the very bottom of the net cup which allows water to wick upward toward the roots. Lastly, fill the space up with whatever media you like to use, and pot up your plant. Bottle gardening is as easy as potting a regular plant – it just takes a couple extra steps ahead of time.
When I first came across the idea, bottle gardening seemed a little daunting, but in the end only took an afternoon, with parts that I mostly found around the house. Now, I am likely to break any nifty looking glass bottle I find and turn it into a new planter. Eventually, I would like to make a garden that fills a window to grow plenty of my favorite food: salad greens. I will be sure to post that too!

Leave a Reply