 Growing hops can be an incredibly fulfilling undertaking on a number of levels. The most obvious benefit to growing hops is that you can make your own beer with them! However, there are myriad other uses for the hop plant. Hop shoots make an excellent addition to salads or light stir-fries, hop bines make for beautiful ornamental displays, and certain hop compounds are considered a sedative when consumed. If you find that you’re inclined to throw some rhizomes in the ground, then there are a few things you need to know first.
What’s a rhizome?
 Every year that we offer hop rhizomes for sale, we inevitably get the question: “What is a rhizome?” The easiest way to answer this question is to compare typical plant growth and rhizomatic plant growth in simplified terms.
What we would consider a typical plant in this comparison has two sections: the root mass and the vegetative mass. The root mass serves to anchor the plant and act as an uptake for nutrients and water, and the vegetative mass is responsible for photosynthesis. The two are clearly defined and separated by the soil line.
In rhizomatic plant growth, there is a third piece to the puzzle. A rhizome is essentially a stem that exists underground and acts as an energy reserve for the bulk of the vegetative mass (Homegrown Hops, p. 31). Think of it like a tree branch growing underground and sending up branches through the soil.
The rhizome, for all intents and purposes, could be thought of as a part of the root structures, since roots do extend from the rhizome. However, it is technically considered to be an underground stem and conceptualizing it this way is paramount to the successful growth and care of your hop plant.
How to plant your hop rhizome
Hops, as a rule of thumb, aren’t very difficult to plant or maintain. However, there are a number of variables that you will need to be aware of that impact into how successful your hop planting will be and how much your plants will thrive. The first thing you will need to do is pick where you will be planting your hop rhizome, and the two biggest factors to take into account here are sunlight and drainage.
Your hop plant is going to want full sun exposure in order to thrive and grow to tis full potential. A hop plant has the potential to grow 20-30 feet in a season (Homegrown Hops, p. 13) and will need at least 6-8 hours of full sun a day to achieve this. You will also want to select an area that is naturally mounded, naturally sloped, or has been altered such that it drains more readily than its surroundings. The rhizome will want soil that remains moist, but drains well. They will also prefer to be in soil that has a pH of between 6 and 8. Properly mulching your hop bed will also help promote moisture retention and drainage with good balance.
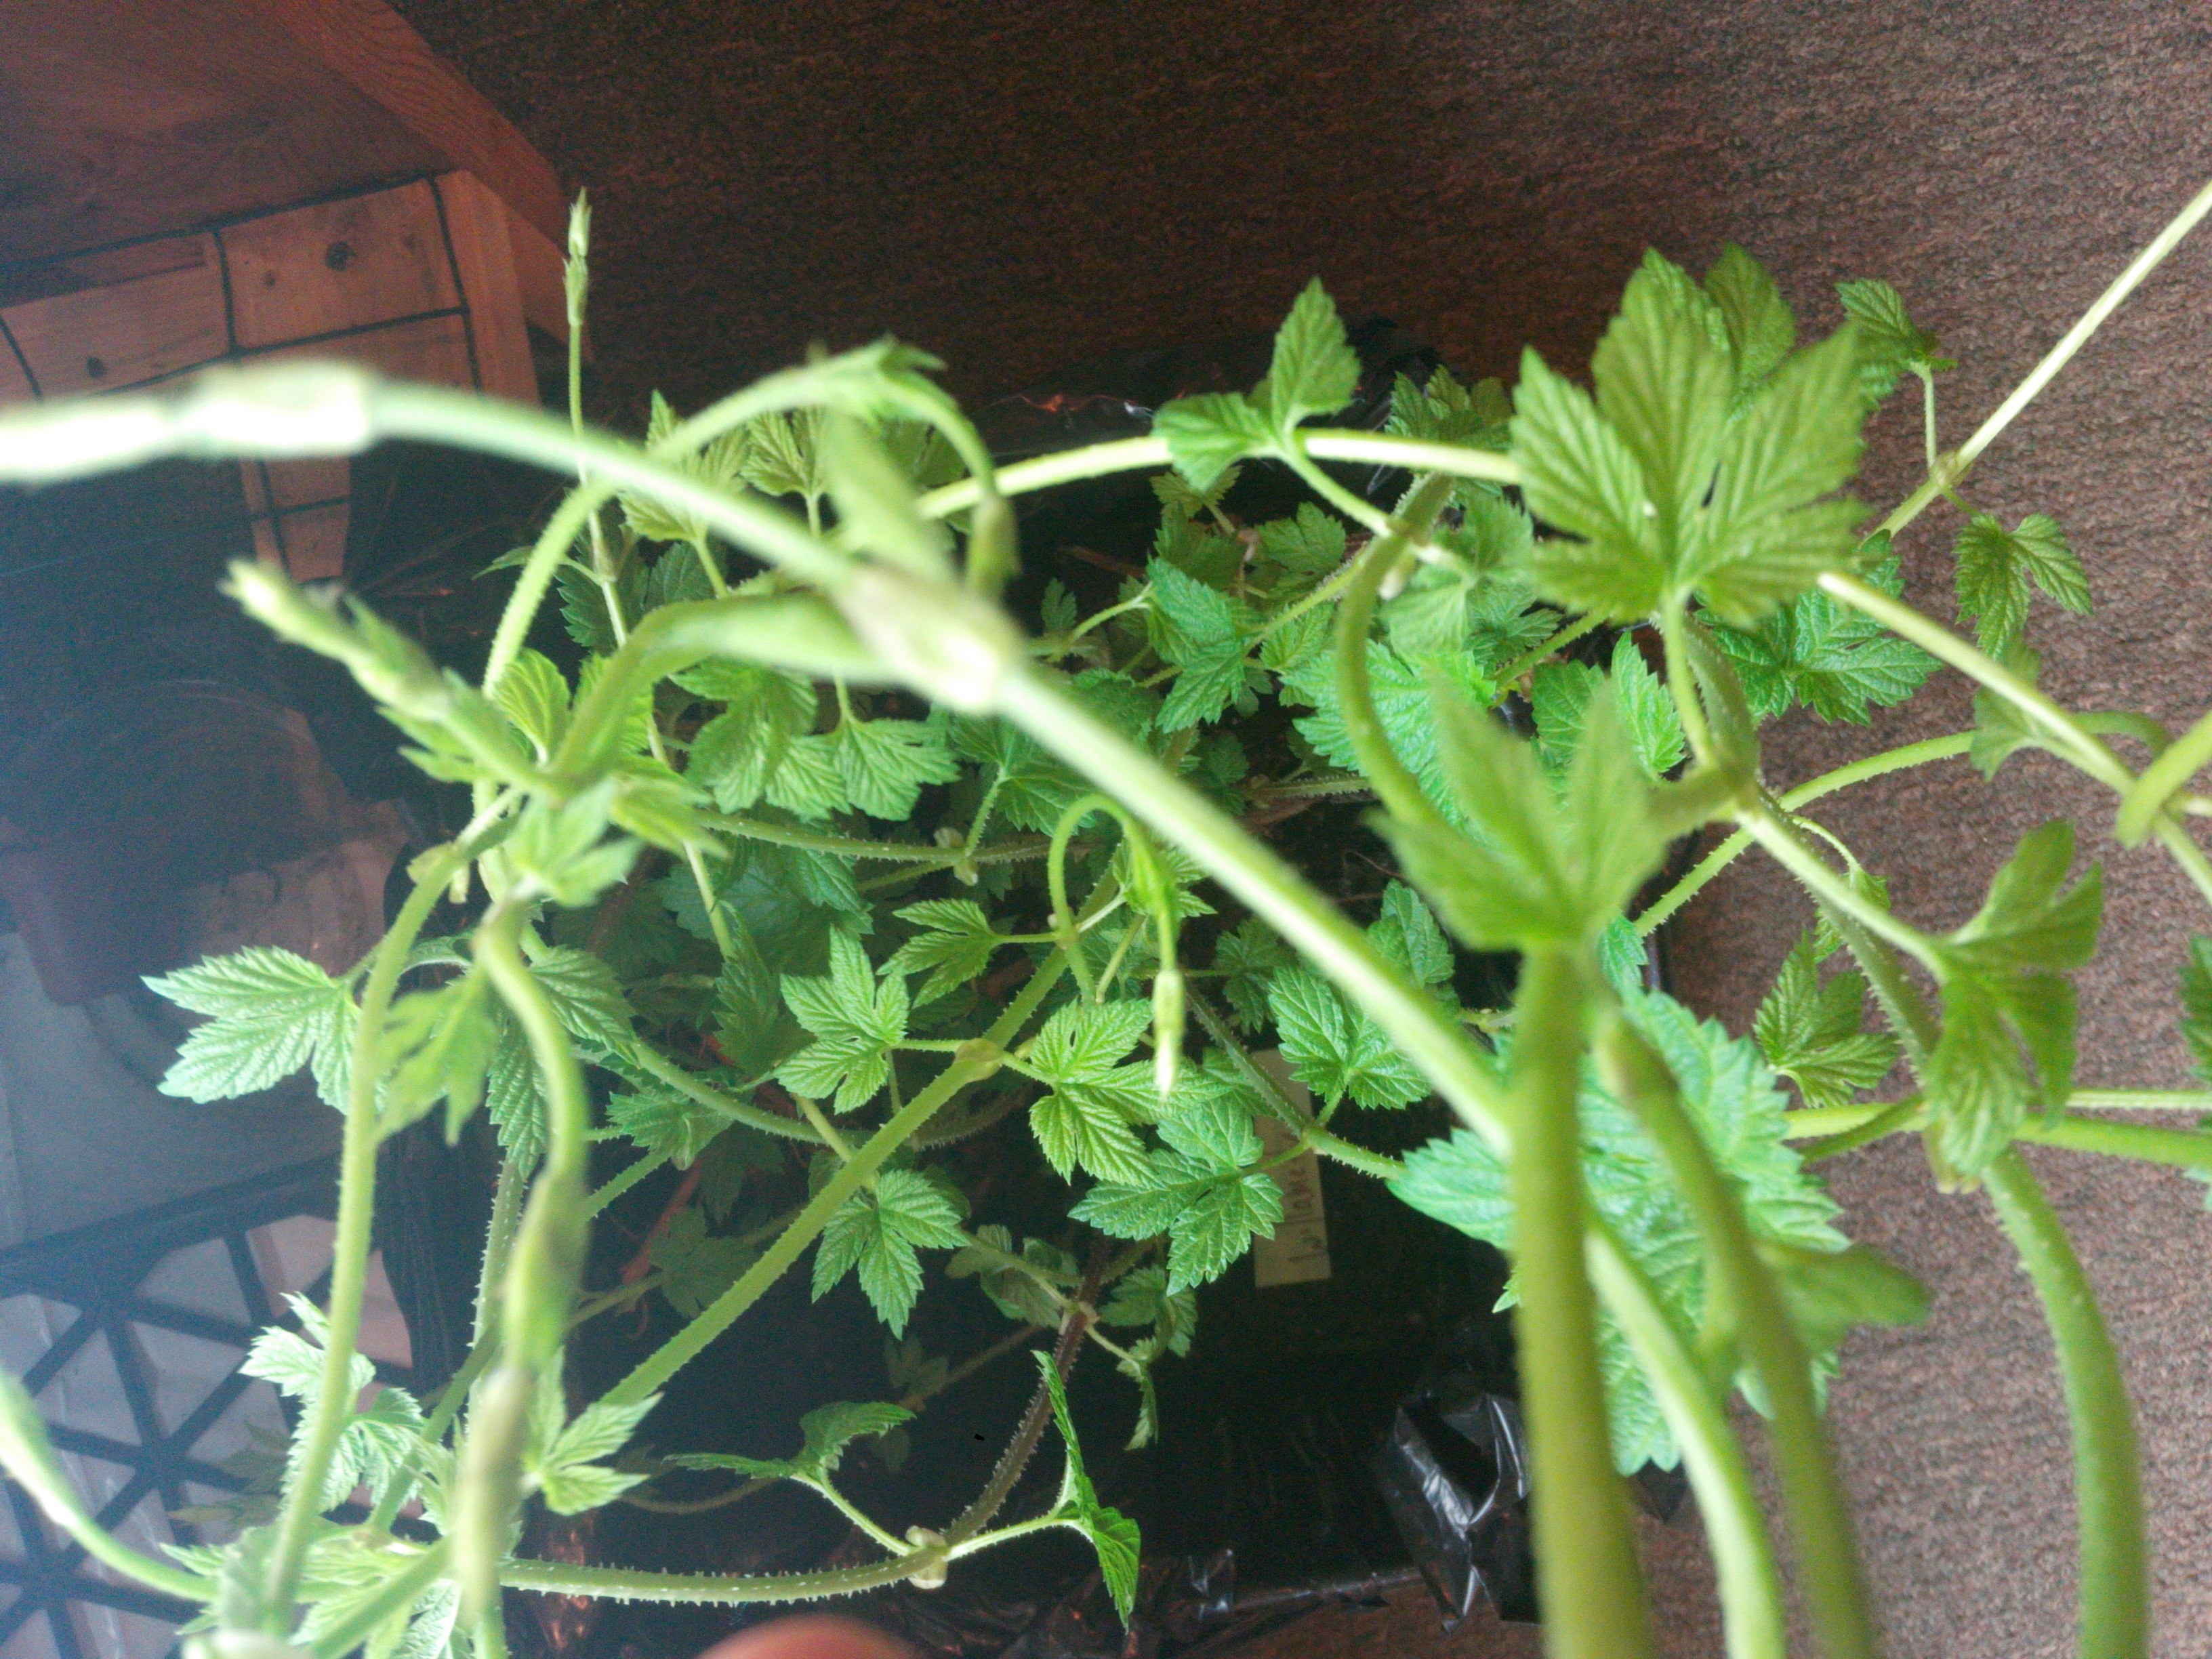
Another factor to consider when planting your rhizome is where you will be training the bines. I’ve already mentioned that you can expect 20-30 feet of growth in a season, and you’ll want to have a plan for where that growth is going to go. There are a number of trellis systems that work well, or they can be trained to grow along a fence or up the side of a house. Also, keep in mind that they’ll need to be easily accessible if you plan on harvesting the cones. If you aren’t planning on harvesting your hops then you can simply plant them by a fence or other structure that they can climb naturally. They will grow very quickly and do very well at creating living barriers.
How to separate your rhizomes
We’ve already established that hops can grow a lot in a single season and it stands to reason that their rootstock will spread a fair amount as well. Turns out it does! So, if you want to keep your hop crown happy and healthy or ever want to add more hop plants, you’ll need to split it up every three years or so. The process of digging and splitting your hop crown seems much more daunting than it actually is. That being said, we decided to photograph a little step by step in order to take out some of the guesswork.
First things first, you’ll need to dig up your hop crown and check it out. The best time of year to do this is usually early to mid-March for the mid-Atlantic region. A good rule of thumb is to dig and split the plant before your first set of shoots is able to reach six inches in height (Homebrewer’s Garden, pg. 36). When you dig your rhizome be wary of the fact that it has probably spread a good bit in all directions. It helps to dig a few tentative holes and then establish which directions your main shoots are running so that you can be sure not to chop through them with a shovel.
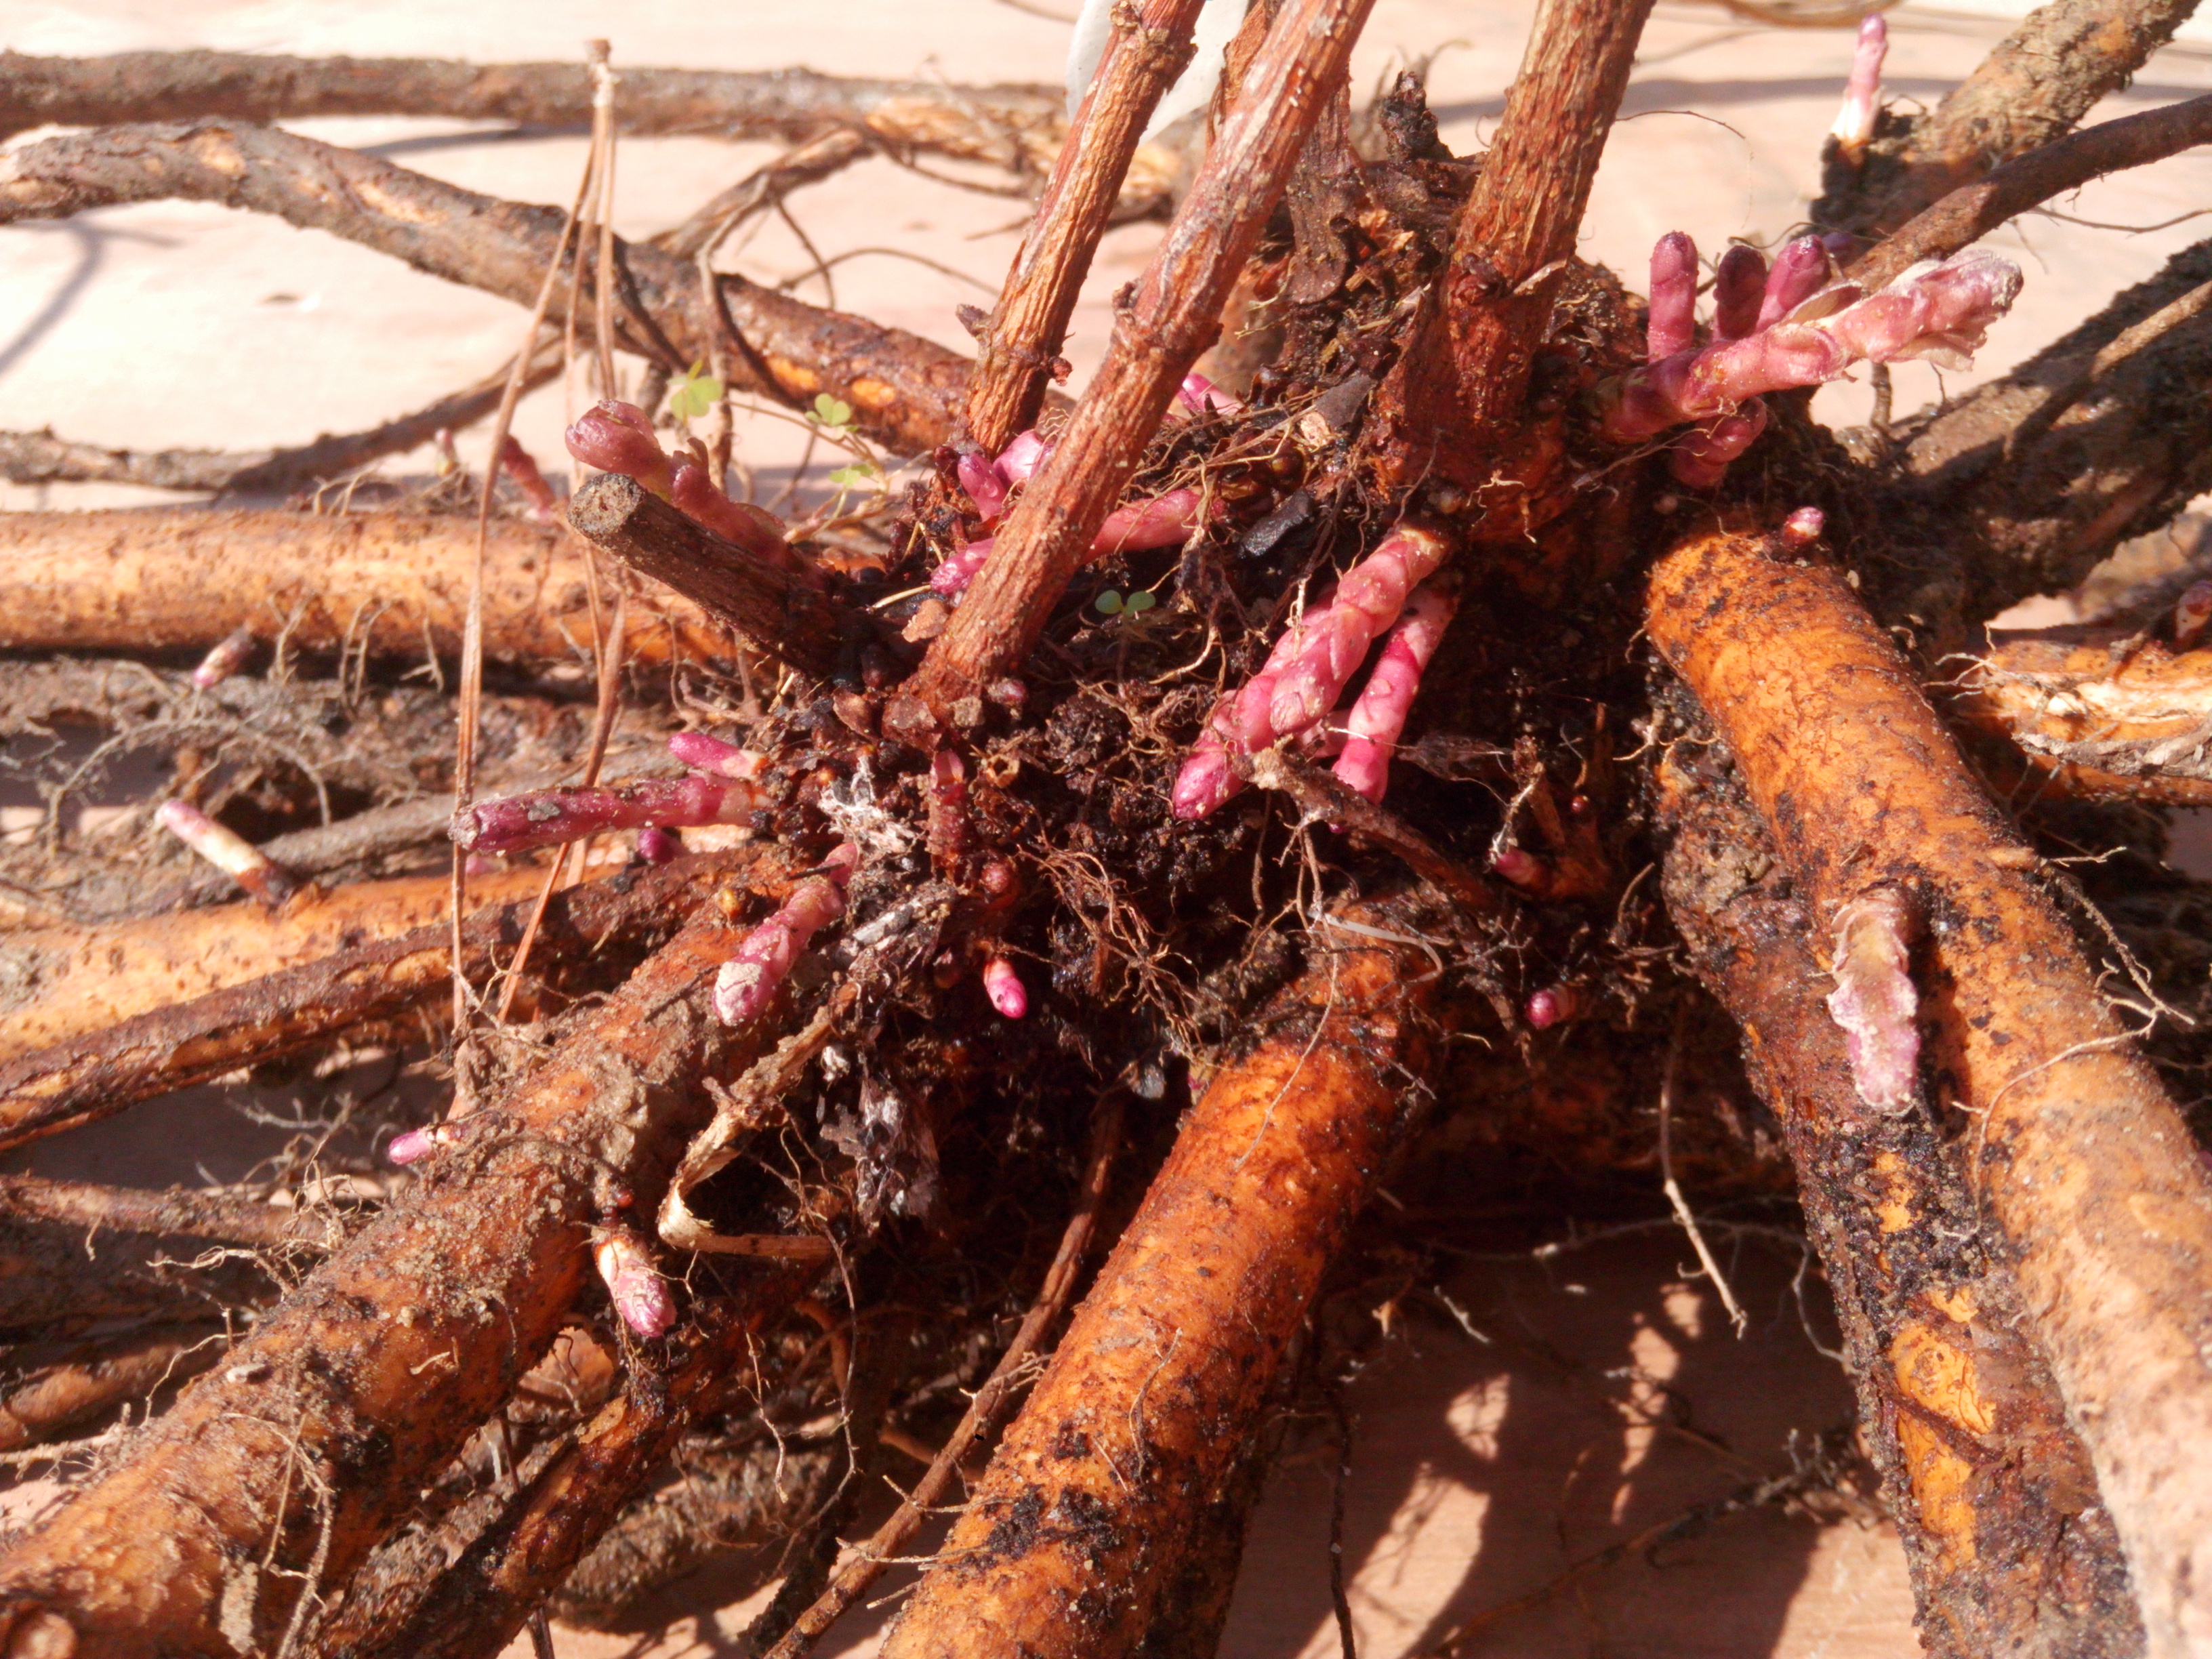
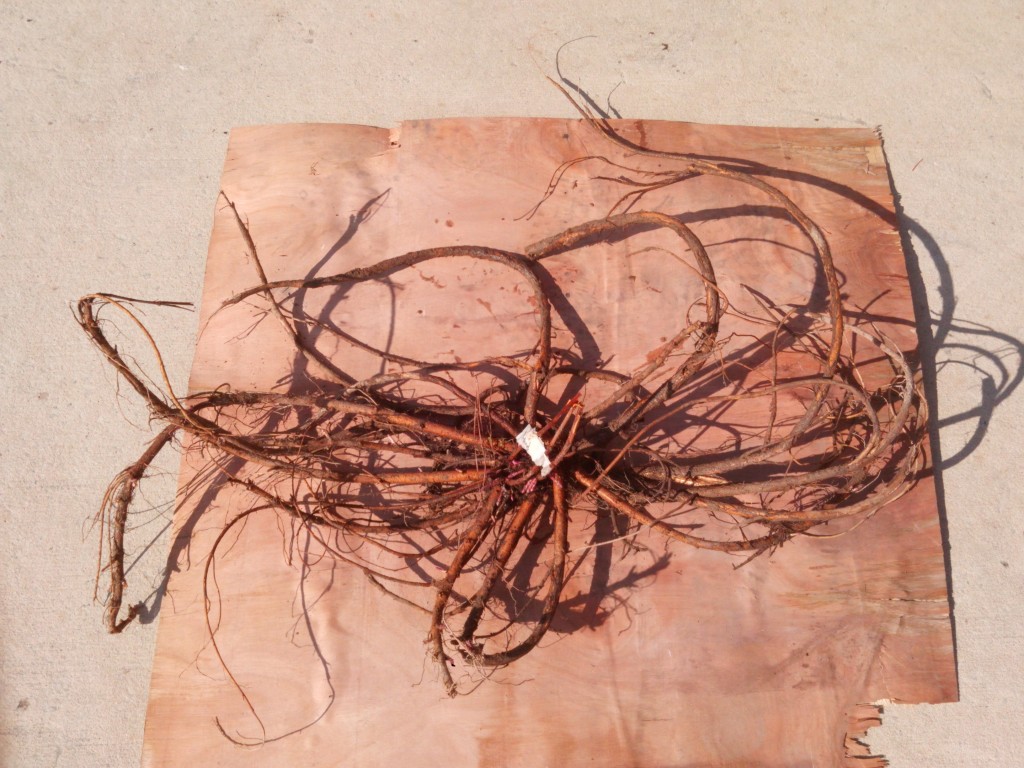
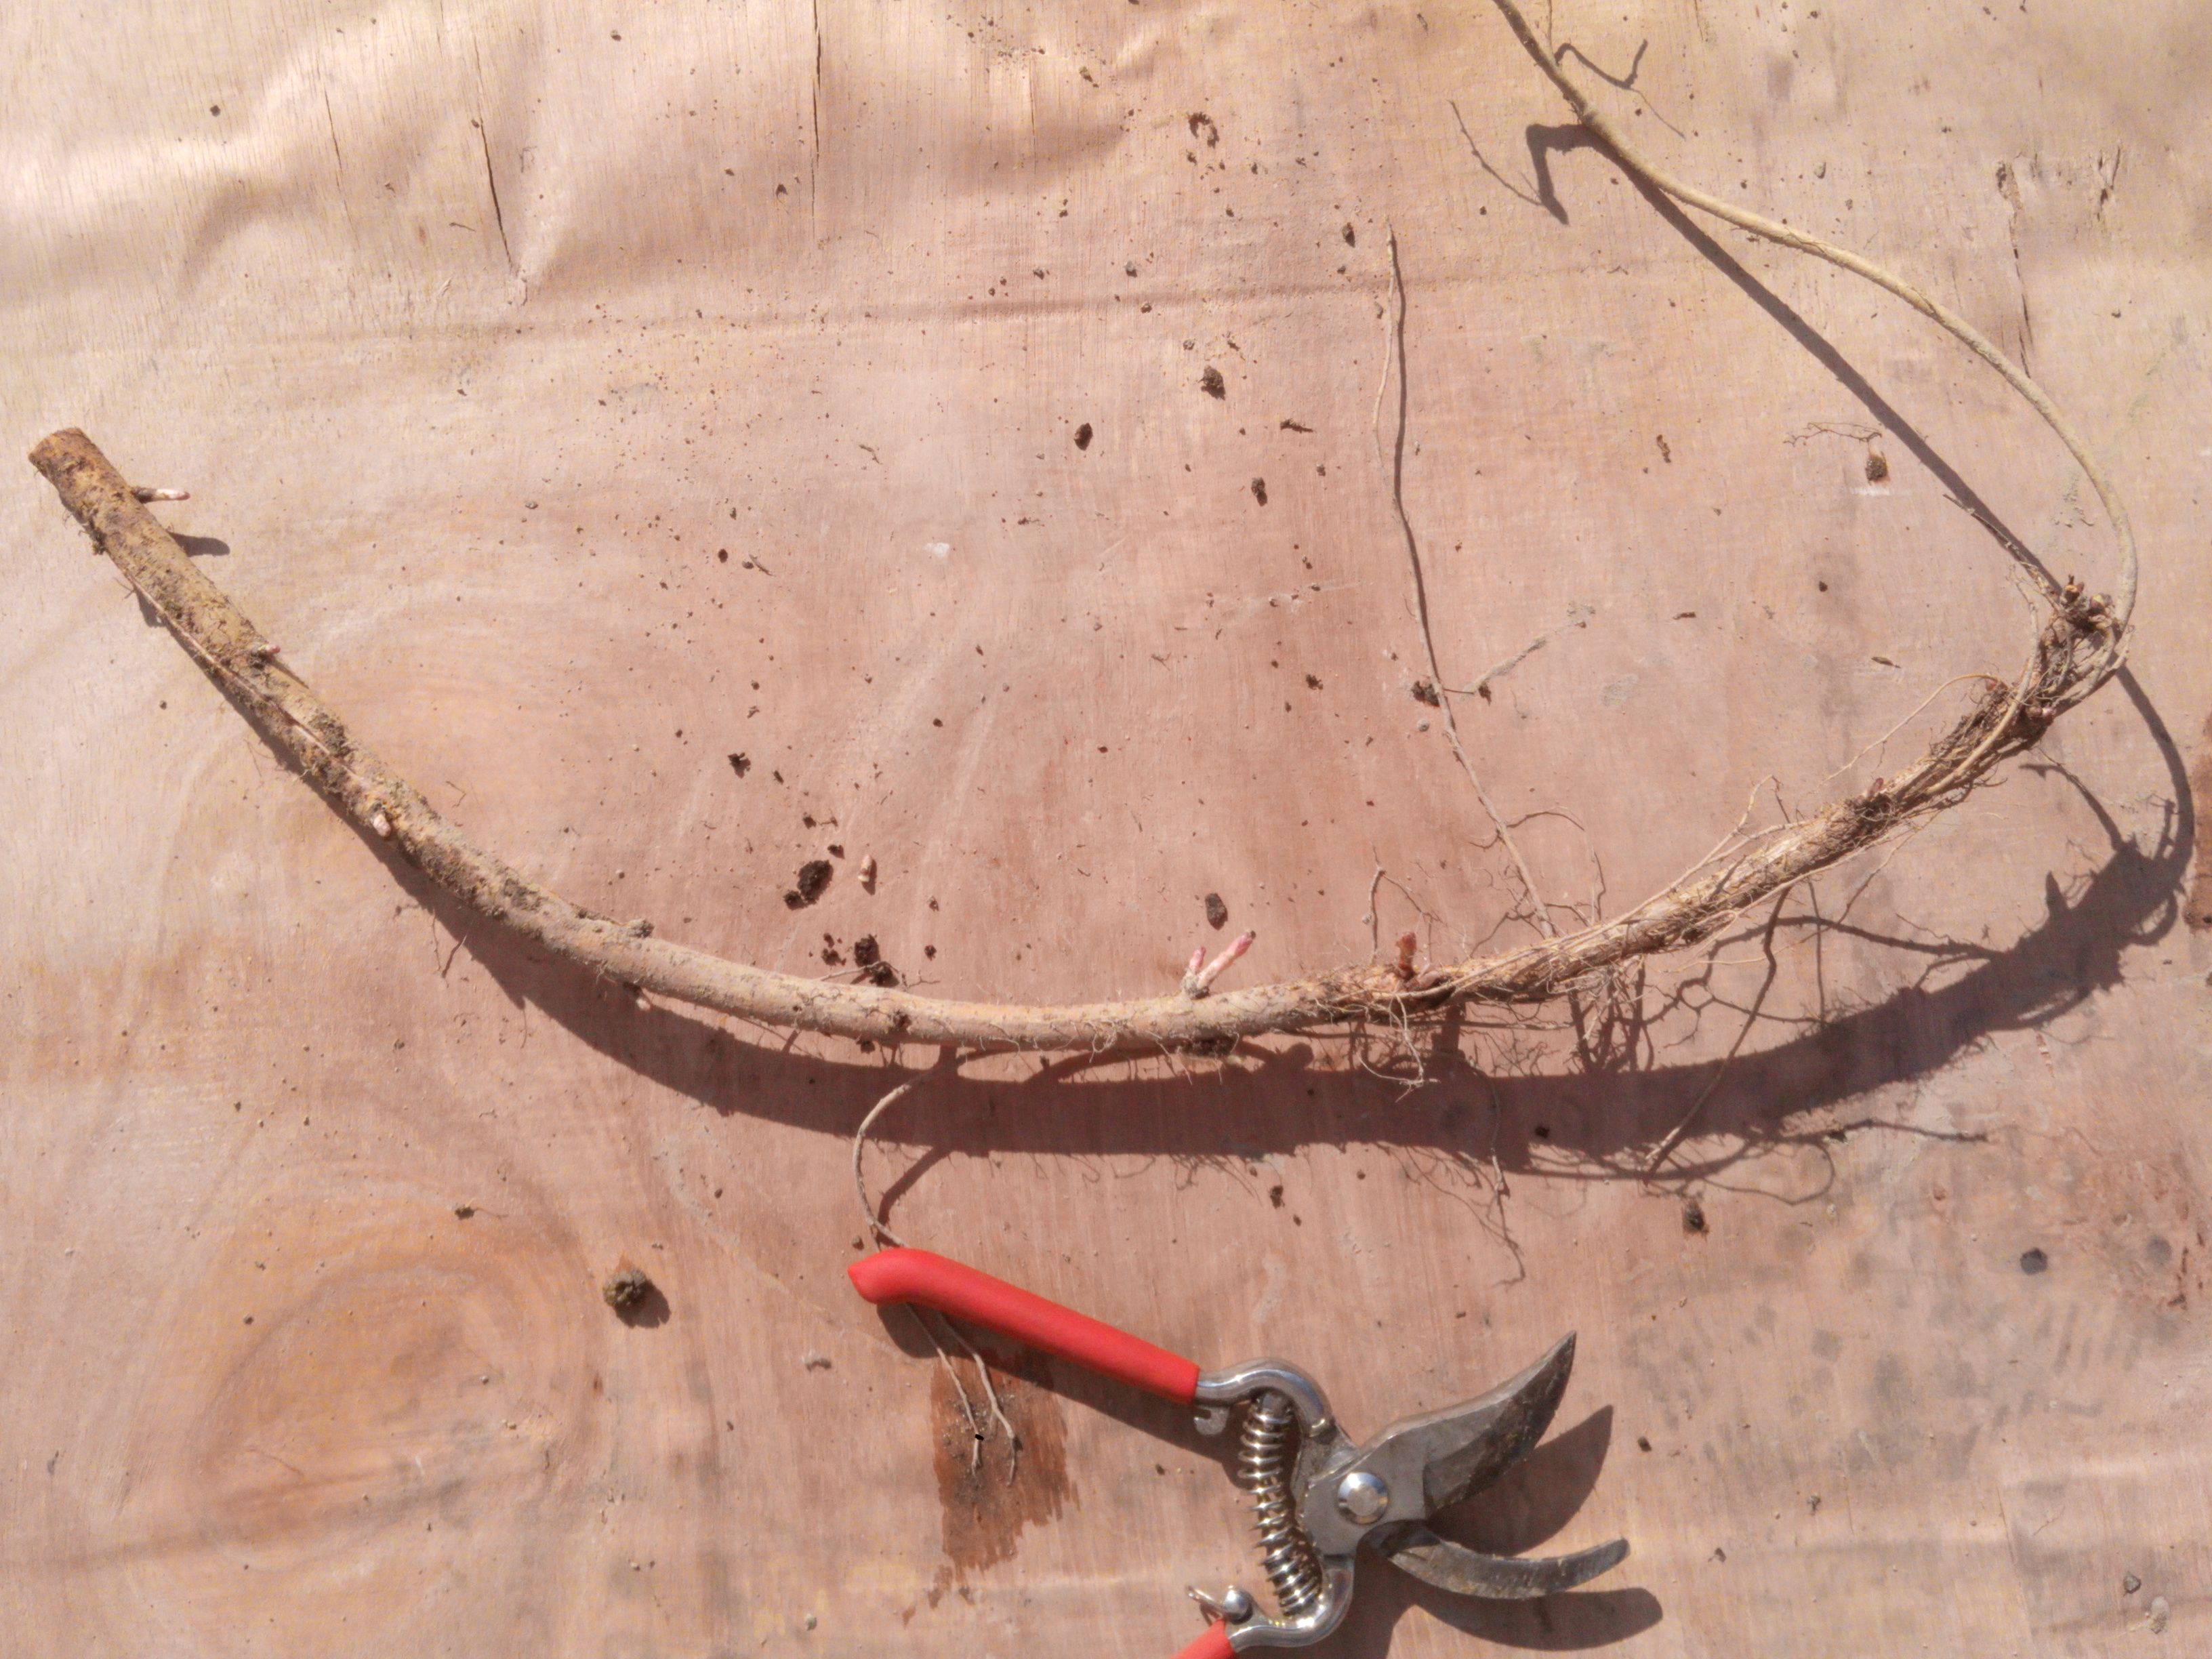
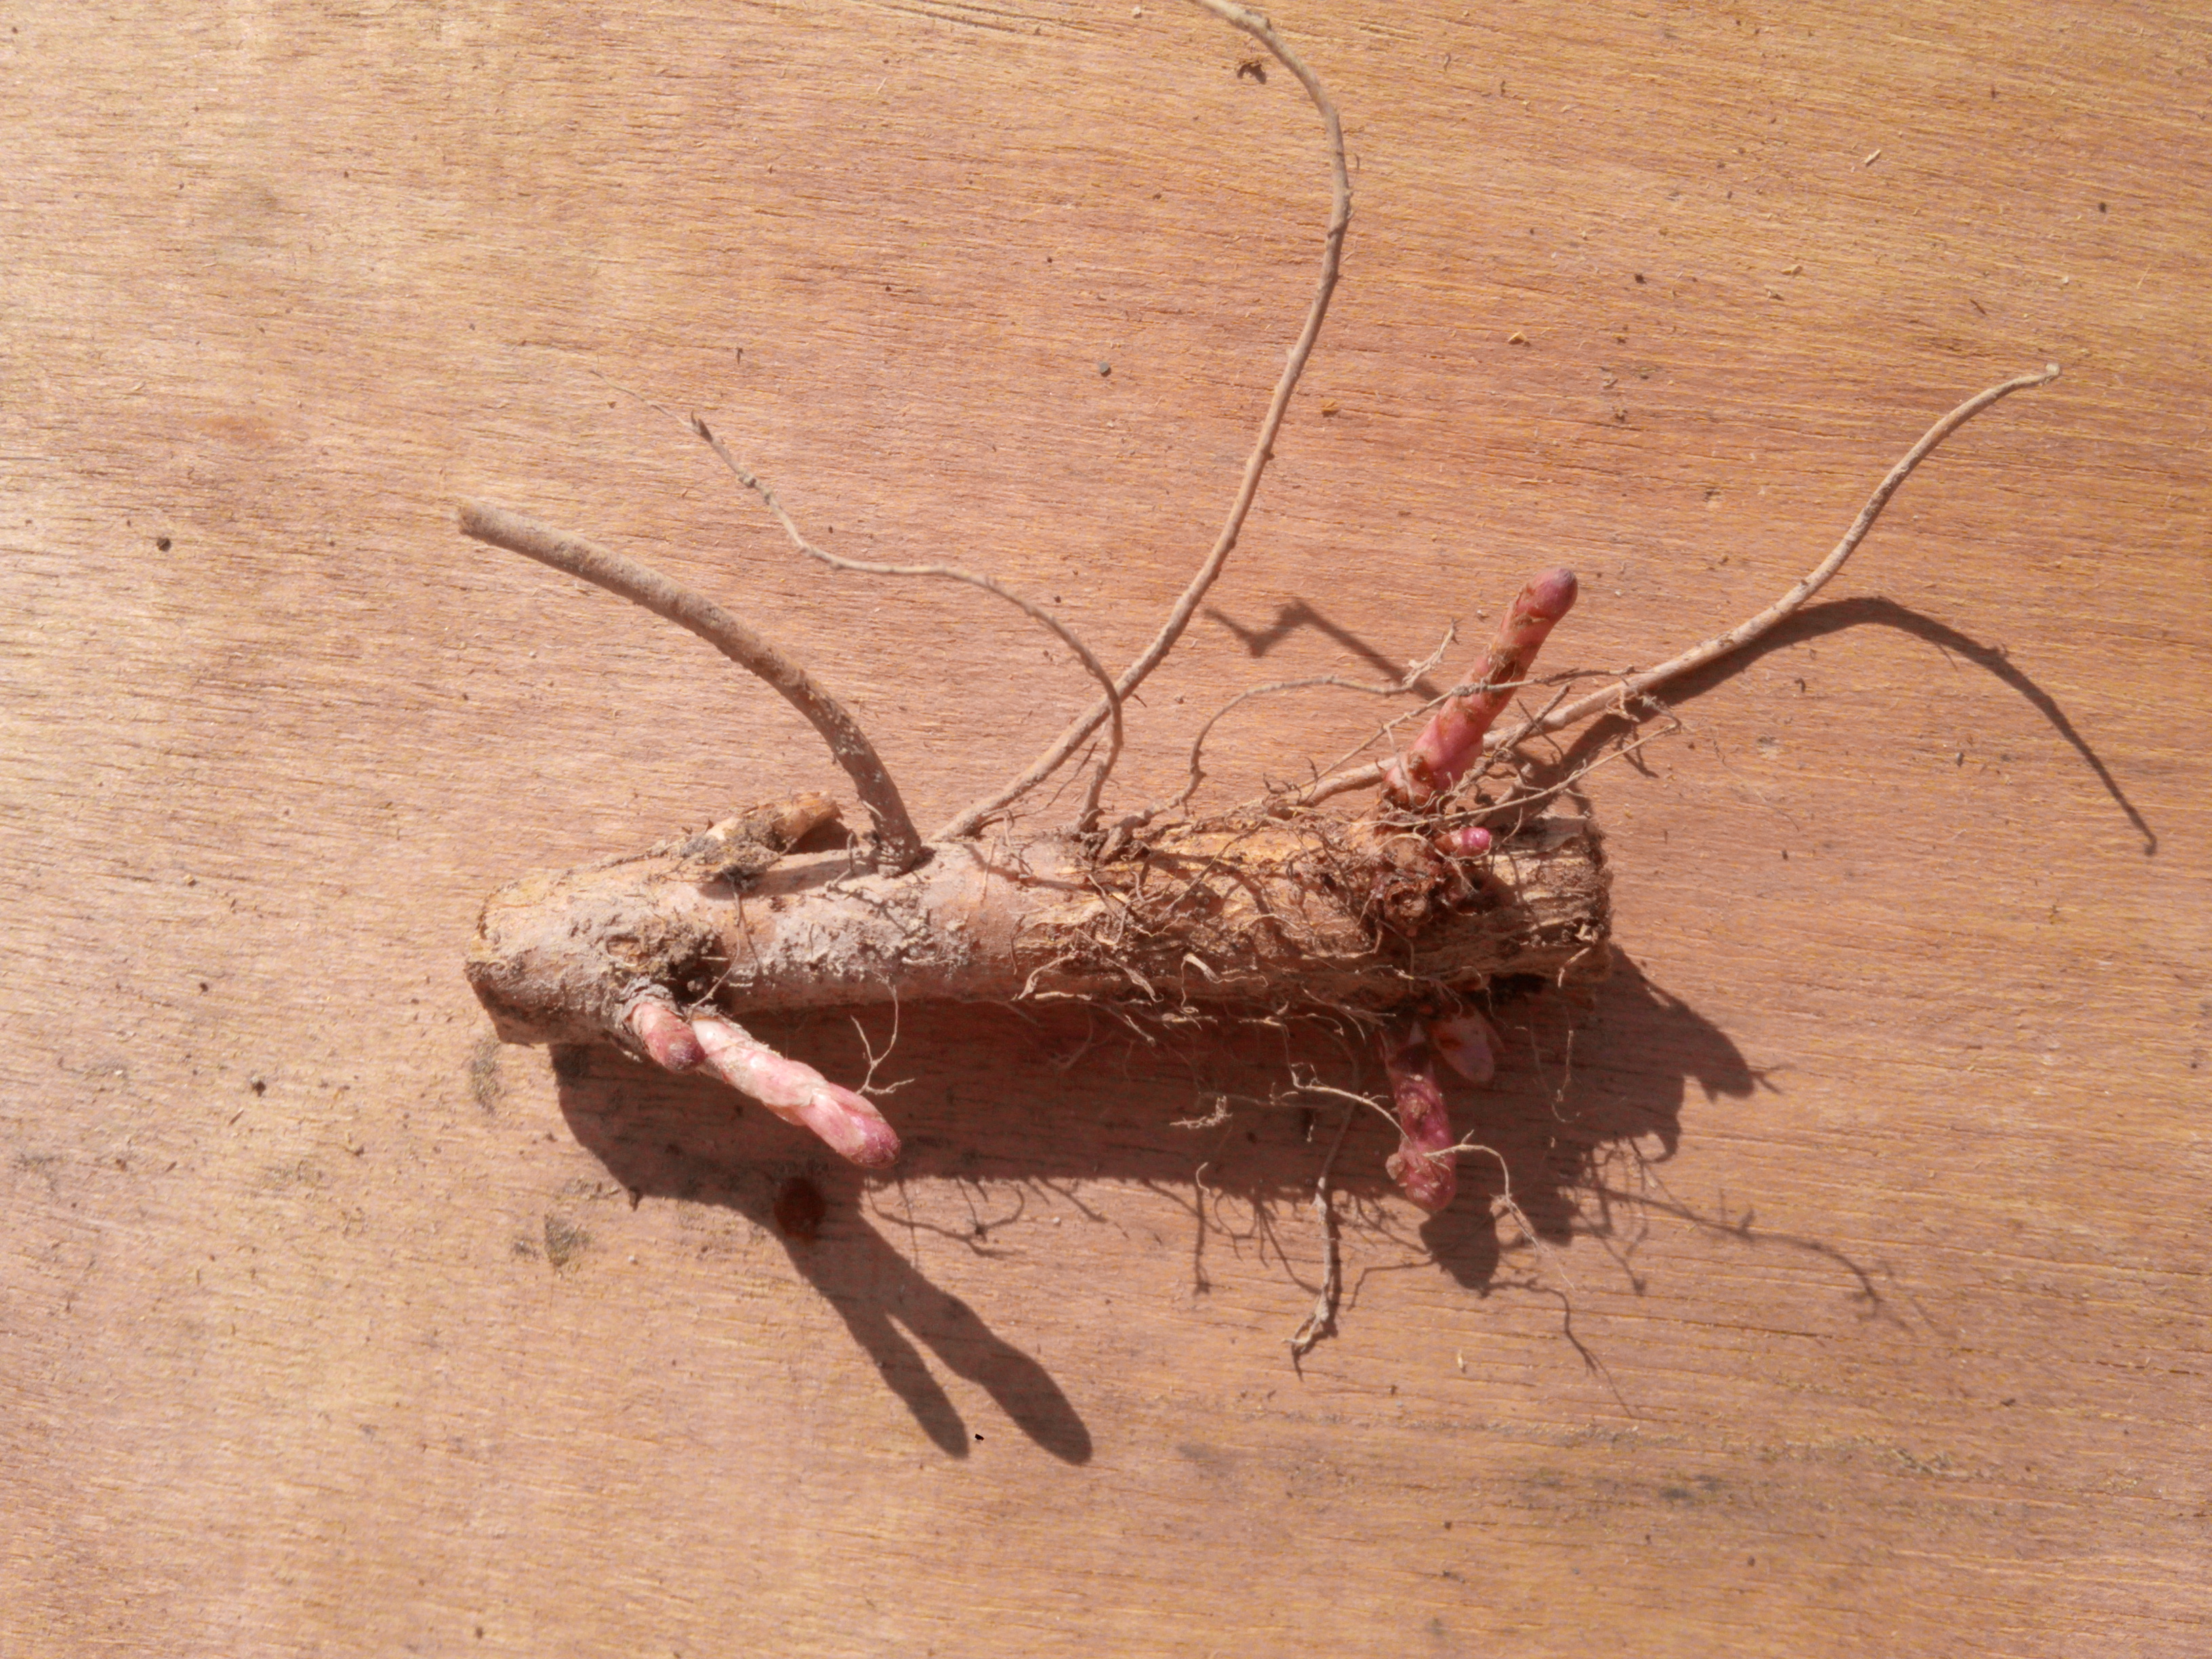
Once you have your hop crown out of the ground it will look like a mass of roots with a thick central section. (Fig. 3) You will want to select a workspace that is large enough to contain the entire crown and doesn’t force you to hunch the entire time. A table or workbench usually serves the purpose well. Now that you have your hop crown spread out, you’ll want to begin identifying the harvestable sections of rhizome. We’ve found that it is usually easiest to separate large sections of rhizome from the main crown and break them down one at a time. (Fig. 4) If you look closely at Figure 4 then you will see that there are sections every 4-6 inches that are showing a bud or shoot. Those are the best candidates for a new rhizome (Fig. 5) and you can simply cut them with a pair of clean shears just past each shoot. Once you’ve broken down your crown, you will end up with a bunch of smaller sections of rhizome that look like chunks of root with buds coming off them (Fig 6). Not all viable rhizomes will be showing shoots so don’t be discouraged if some of your sections don’t have fresh growth showing. So long as the rhizome feels firm, doesn’t show any damage, and remains moist then you should be good to go!
Whether you’re planning on growing hops for brewing/culinary purposes, as a decorative addition to your property, or to help you chill out every now and then, you’ll want to have the foundation necessary to grow them well. If you follow the simple guidelines that we’ve set forth here, you’ll be primed for success. The only next step is getting some rhizomes, so stop by the nearest Fifth Season Gardening Co. before supplies run out!


Kevin Shanks says
I live in England & have been growing hops in my garden for 3 years. I eventually take them to a brewery in October. You are very informative & i have made a few notes on how to seperate them etc thankyou.
Dave says
I’ll be moving how can I take my hops with me? Had them for 5 years
brian says
Great question. This should be fairly straight-forward and doable. Dig a circle around the plant and deep enough to get the full root ball. How big will depend upon the size of your hops. Bigger plants = bigger hole. As long as your shovel isn’t cutting through the hops, you should be in good shape. If it will be a while before you transplant, you can put your hops in a large pot with additional potting soil. If it’s just a move across town, a plastic bag will do the job. The goal is to keep everything from drying out. When your hops make it to the new spot, dig a hole as deep and 1.5 times wider than what your are transplanting. Be sure to plant at the soil level and not go too deep as that can cause root rot over time if water pools. Then just place your hops in the new hole, backfill with the soil you removed and water in well. Watch it closely over then next several weeks and especially during the hot summer if you are moving it now (early in the season). If you are doing this now, and the hops haven’t grown too much for the season, you can just leave the new growth. If it’s going to happen later in the season, you will likely need to prune the vines back to something manageable. This could also be a good time to split the rootball and make two smaller plants in the new location…depending upon your situation. Also, you may not get much of a harvest this year, but you plant will settle into it’s new home within a season or two. Good luck!
Durffy says
Can I eat them?
brian says
Yes, you can eat hops too…but that leaves less for the beer!
Rebecca J Beebe says
What about dividing the rhizomes in the fall?
brian says
Great question. This is absolutely possible and recommended every 3-4 years to keep your hops as happy as possible and producing at maximum yields. Wait until after you’ve cut them down for the season. Then simply divide with a sharp (sterile) knife and replant. Best of luck!
Dave McCormick says
i bought some cascade hop rhisomes…it’s now Jan. 13th…..how do i store them till spring? …thanks for your time!
brian says
Thanks for your question. A good way to store them would to be to put into some damp soil and leave them in your refrigerator if you’ve got space. Alternatively, you could plant them now and they should grow in the spring. Best of luck!
J says
I was fortunate enough to get a couple Spalter Spalt (German) rhizomes about 8yrs ago. The first 3-4yrs I wasn’t able to do anything with them except watch them grow. The past 3yrs I’ve been wanting to cut back and split the rhizomes but the springs have been very strange (cold/frigid longer than usual then extremely wet and then early hot) and haven’t been able to do so. I’ve been happy with the harvests (approximately 1/4# or so; plenty for the amount of brewing I’ve been able to do) but really want to trim them back so more energy goes into the bines & cones for an even better harvest. I’m in SE WI.
When I’m pruning can I leave the crown(s) in the ground and just cut out sections?
When is too lat in the season to do the pruning?
brian says
Thanks for sharing. In the article we recommend digging out your rhizome for splitting so that you can visually see what you’re removing and then replanting. Of course, you could just cut out sections as you suggest. This would be easier, but risks cutting out the best parts as you won’t have a full picture. As for when to do so, we recommend that you do this early in the season. As you’re in SE WI, probably now is a great time! Best of luck.
Kelli De Vight says
How do you dig out the rhizome and put it on a table when there is the ‘underground branch’ connected to it? Maybe I’m misreading but it sounds like you say not to cut through this bit?
Thank you!
brian says
Thanks for your question. When digging an established rhizome, you’ll need to move slowly and take your time to make sure that you don’t cut through any main growth. Not rushing is the best advice!