-Mike Weeks-
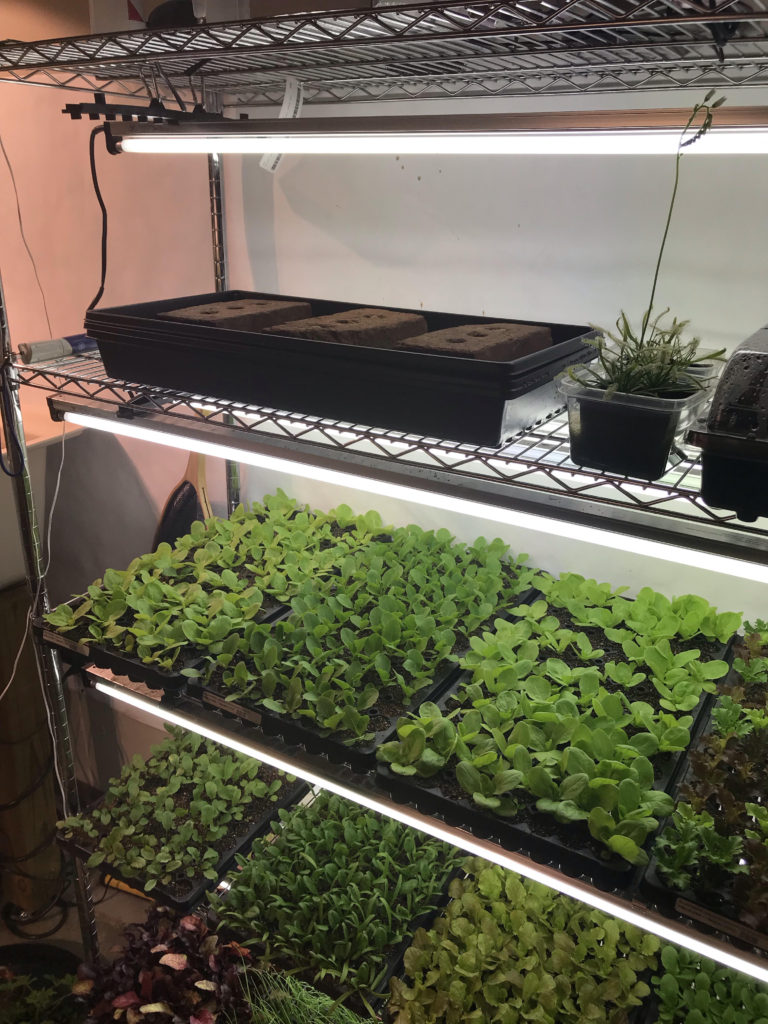
Growing food indoors might seem intimidating, but it is something that you can incorporate into any homestead. Using LED or even T5 fluorescent lighting, it is very easy to set up a small growing space that doesn’t require much energy to produce quality results. This single indoor space can serve several purposes: growing plant starts for the outdoor garden; keeping a few herbs around through winter; supplying supplemental lighting for a house plant or two; or growing my favorite nutrient powerhouse, microgreens.
These small delicacies are seeds sowed densely and harvested early, giving you a vibrant, nutrient-dense, and year-round food source. Because nutrients are concentrated in the seedlings, and we are consuming them just after harvest, it is hard for any other food to compete with the nourishment we can get from microgreens. Testing has shown microgreens to be from 4 to 40 times more nutrient-dense than their mature counterparts. Plus they are tasty and versatile. Use them in salads, egg dishes, smoothies, sandwiches, or really any of your favorite dishes. Popular and easy varieties to begin with include sunflowers, peas, salad mixes, and radishes, but there a many others, and even more ways to make blends with them. We encourage experimenting!
Let’s start with the basic equipment needed.
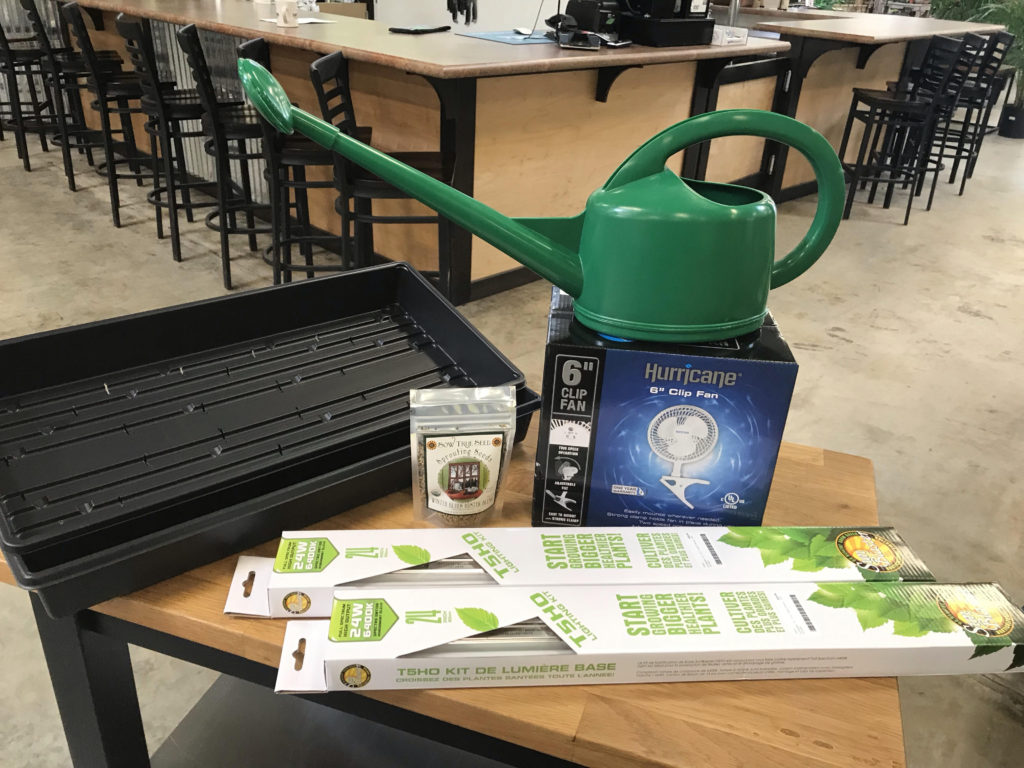
- The light – we suggest a minimum of a 2 foot T5 Fluorescent Fixture. Two of these over two 10×20 flat trays is ideal.
- The container – each setup will contain two trays; one solid tray for the bottom and one with holes to go inside the solid one (we are creating a bottom watering system)
- The growing medium – in this case, we will use coco coir, but there are many substrates that can be used, including one made from hemp.
- Digital Scale – used for measuring out the proper amount of seed per tray (they vary)
- Watering Can – it is helpful to have a shower head when watering from the top
- Small Fan for air circulation
- Harvesting tool(s) – This can be a really sharp harvesting blade or even a sharp pair of scissors. Scissors are not preferred for storage micros as they can bruise the stem, shortening the shelf life.
- A weight of some sort (a brick, heavy books, whatever can fit into a 10×20 tray)
All equipment should be clean and sterile. Use bleach, hydrogen peroxide, or Star-San to keep everything sanitary. Microgreens are the perfect environment for growing mold if ideal conditions are not met. We find that room temperature will work for most microgreens. The biggest key to success is proper air movement. Allow a fan to gently move some air across your plant canopy. Allow your lights to run for at least 14 hours once the newly germinated flats go under them.
Lets seed some trays!
Step one:
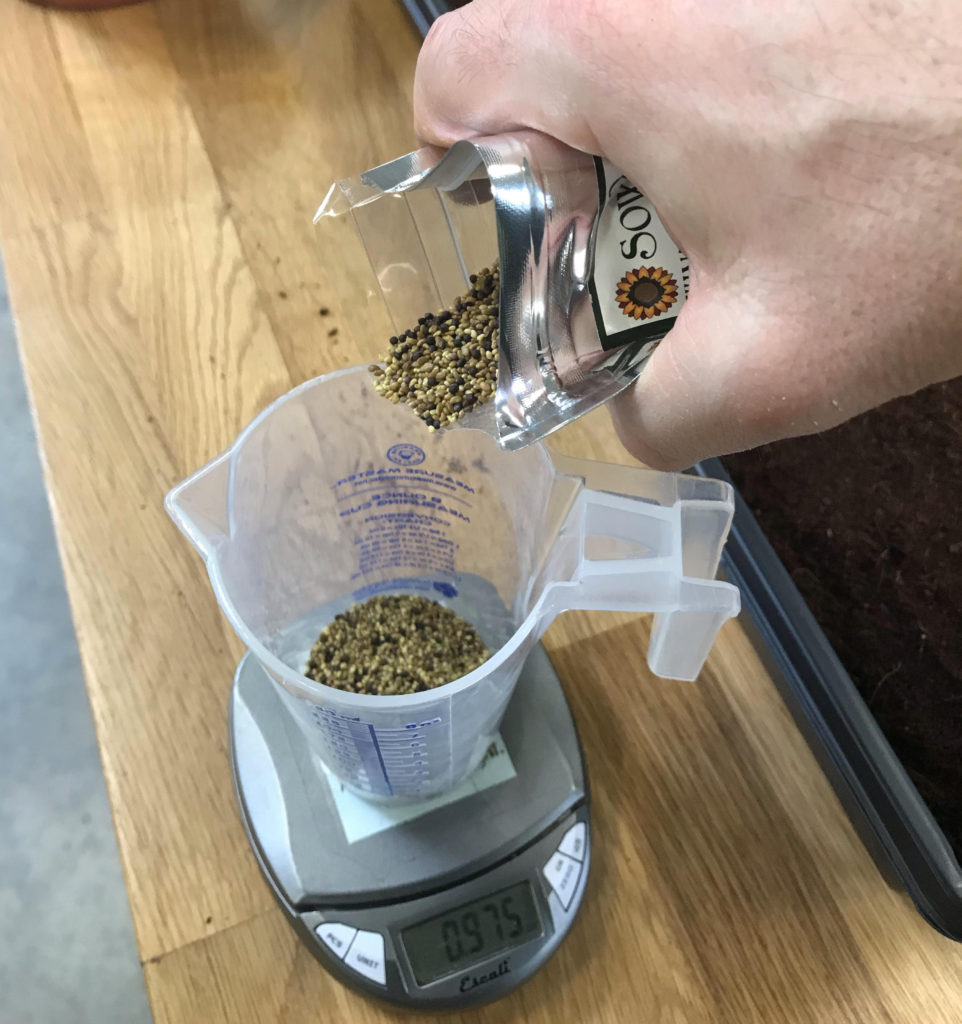
Determine if the seed needs to be soaked. Some seeds, such as peas, sunflowers, chard, beets, corn (generally, the larger seeds) fall into the “soak” category. For these varieties, weigh out the proper amount of seed for the specific crop, add to a container, and add enough water for a soak. I like to soak my seeds in jars because I produce on a small scale, but if I wanted to soak enough peas for 4 trays, for example, I would use a bucket. Some varieties will swell as they take up water, so account for that when selecting a soaking container. Using tape or labeling system, mark the time when the seeds should come out of soak and into the trays. I like to rinse the seeds in a colander before sowing.
Step 2
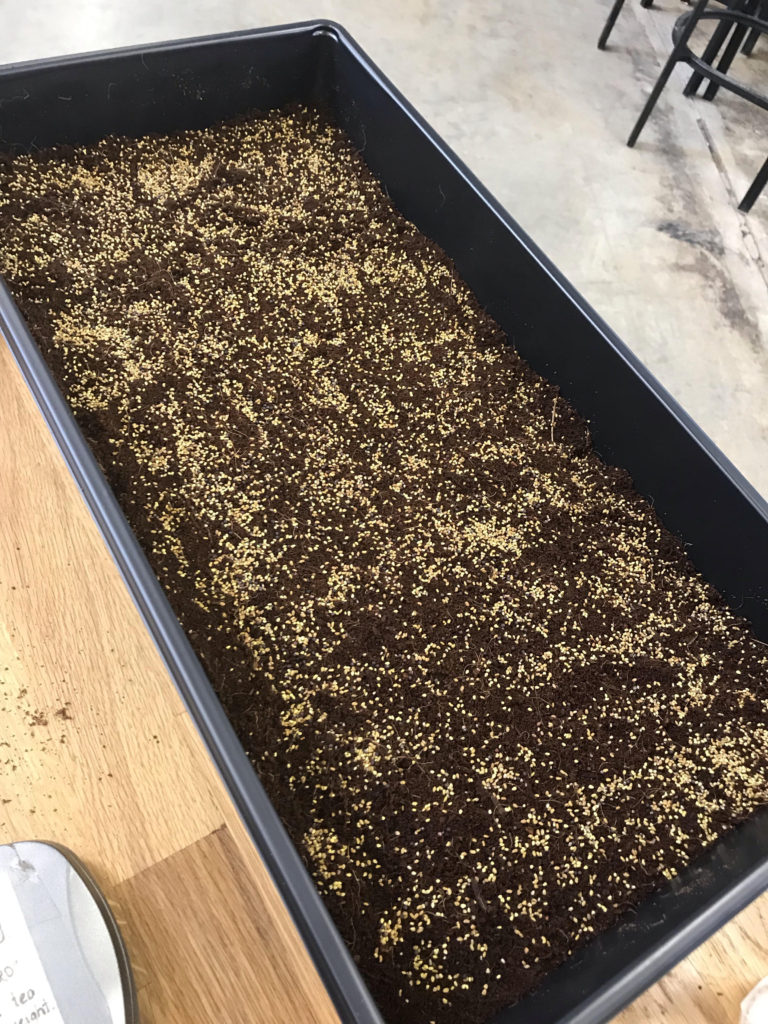
Fill the flat tray that has holes with about ¼ inch of coco coir and spread evenly. Try to compress it down using another flat tray. Spread the measured amount of seed over the coco, trying to spread as even as possible. Lightly water the seeds into the medium. Once the tray has a moment to drain, place it into the flat tray without holes.
Step 3
Stack your trays on top of one another, and place a weight on the top one. This is one of the best ways I have found to ensure great germination. Before we put these trays under lights, I suggest stacking them in a darker place until the seeds germinate. I prefer the top of my plant rack as the lights below serve as a heat mat for the trays. This process can take 2 or 3 days, depending on the seed variety. The weight of the trays stacked up allows for the best seed to soil contact (or coco in this case!). Check daily. Once they have all germinated and look like young sprouts, they are ready for the next step. If you plan to only germinate one tray, you’ll need to consider a way to add weight to it. A piece of plywood cut to size with a handle mounted to the top would be best, but another flat tray with a couple bricks placed in them works just fine.
Step 4
Unstack the trays, and finish the greens under lights. The light should be about 12 inches above the trays. This process can take 4 to 7 days. The average height for a finished microgreen is a couple inches, but they need to be harvested before they get tough and woody. Most crops only allow for one cut, but there are exceptions, such as wheatgrass or peas, that can provide a few cuts before giving up.
Step 5
Harvest your microgreens! Using a clean, sharp knife or shears, begin cutting the greens. You can try just cutting what you plan to eat, or if they are getting too mature, harvest the entire tray and store in a container in the fridge. The micros will keep for about a week, sometimes longer, but give them a smell check. If they smell funny or begin to get slimy, it’s time to compost them.
Note – Some growers like to use small plastic insert pots to divide up smaller amounts to be produced at a time. This may be the case if only supplying for yourself or if you want to sample some living micros to a friend.
You can start growing microgreens on a small scale pretty easily. As you learn more, you may want to venture out and try more challenging varieties such as amaranth or cilantro. Explore the different flavors and colors out there, and don’t be afraid to try something new! If you decide you want to produce on a larger scale, we are always happy to assist you.

Buddhike Eakanayake says
Hey, Im Buddhike from Sri Lanka. I’m willing to start a new small scale micro green business. Could you please help me to initiate my business.
Thanks & regards.
Jens says
Hi. My name is Jens coming at you from Pocatello, Idaho. I am starting a small business for personal microgreen delivery in my local area. Could you walk me through how you set up the website and the payments? That kind of stuff.
Jeff says
Hi very informative post, enjoyable & helpful.
Jacquelyn says
So do you never water it again ?
There are no watering instructions.
Thanks
brian says
Thanks for your question. Watering need will vary by conditions. The goal is to keep the medium moist…but not drown your microgreens. How often to water and how much will depend upon temperature and airflow. If it’s moist to the touch…you’re good. If not, add water slowly and give it time to soak in until you reach the desired moisture level. Good luck!