So you’ve been brewing with extracts for quite a while now. Maybe fumbled through your first couple batches, finding out the hard way to not oxygenate your beer while bottling, or what happens to your final product when you don’t chill your wort quickly enough post-boil. Then you got the hang of it, started to master hop additions, maybe engineered your perfect water. You got your process down to a T, and even experimented with your own combinations of liquid and dry extracts, partial mashes and specialty grains. Perhaps you even graduated to kegging your beers, but what’s next?
All-grain brewing!
All-grain brewing is an excellent next step in customizing recipes and clones into your next masterpiece. A fair warning, all-grain brewing can mean quite an investment in equipment, space and time, but for a committed homebrewer it can be a very rewarding and satisfying experience to brew like the pros. Although it might seem pretty intimidating when you start reading about mash pH, starch conversion this, and amylase enzyme that, with the right stuff and knowhow your first all-grain batch will go swimmingly. Personally, it was the best change I made to my homebrewing career, and if you make the leap, I guarantee you will be proud of your brews and never want to go back.
The greatest benefit of all-grain brewing is the wide range of customizations you can make to your wort’s grain bill. Rather than being limited to what the producers utilize to make their extracts, you have limitless flexibility in choosing and amending your base and specialty grains. Unlike extracts which are limited to variations of “wheat,” “light,” “amber,” and “dark,” we carry up to seventeen varieties of base grains that can be mixed in different ratios with one another as well as dozens of specialty grains to achieve limitless combinations. Consider the possibilities!
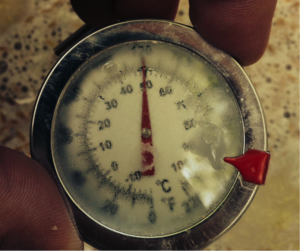
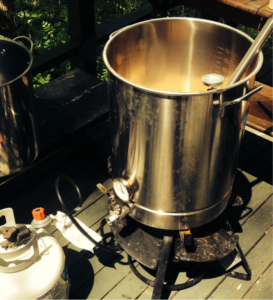
Enough introduction, I’m sure you’re asking what does all-grain entail? What are the requirements? In all-grain we basically take our grains, most often barley, and grind them to break the husks, allowing the internal starches and nutrients to be exposed to the mash. We will utilize various temperatures and chemical processes to change compounds within the grain. In step mashing, after adding the grains to our heated but NOT hot water, we most often start in what is called the “acid rest.” Long story short, this activates naturally occurring acids in the malted grains that bring our water’s pH down to the necessary window between 5.2 and 5.6. This is easily measureable with a pH strip and can be adjusted with various acid blends to bring the pH down further or brought back up with some baking soda. For most styles 5.4 is the desired pH. This step lasts about 15 minutes in a temperature window of (95-113)℉.
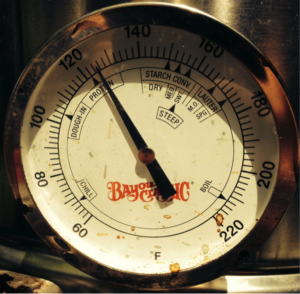
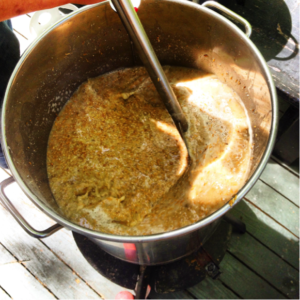
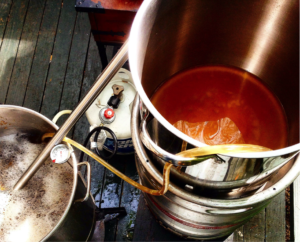
Next, the infamous mashing step! This is where the real magic happens, where all your planning and grain bill mixing will shine. Starch conversion exists in three windows. A brewer can take advantage of these temperature windows in order to convert the starches to various fermentable and nonfermentable sugars. Our “Dry” window exists between 140℉ and 152℉ and, as the name suggests, creates complex sugars which impart dry flavors and are nonfermentable. The degree to which you utilize this window depends heavily on the style you’re going for. The most important window during the starch conversion is the middle window, which overlaps with the dry phase from 150℉ to 158℉ with a ‘sweet spot’ between 152℉ and 154℉. This window is where our fermentable sugars are produced; without a decent starch conversion the fermentation suffers, the yeasts underperform, and you can end up with a low alcohol and starchy beer. To get an excellent sugar conversion keep your mash in the sweet spot for at least an hour, higher gravity beers such as Double IPAs or Belgian Strong Ales may require mashes that last up to 90 minutes. From 158℉ to 170℉ is the upper range starch conversion, which provides us with nonfermentable sugars that produce sweet malt flavors and body. This range is commonly utilized in darker and bitter beers for balance.
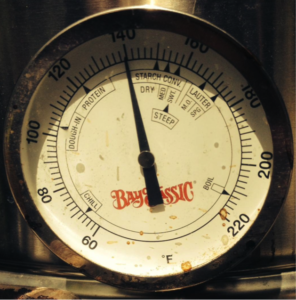
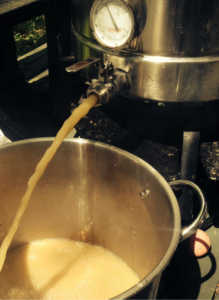
Since we can’t have grains and husks floating around our finished product, we need to remove them from the wort one way or another. This process is called lautering. After our starch conversion is all finished, the first thing we do is denature the enzymes within the wort; this preserves the current state of the wort and keeps the enzymes from doing any further conversion within the mash. The wort temperature is raised carefully above 170℉ as to not overshoot 180℉. Overshooting 180℉ would begin to strip astringent compounds and flavors out of the grain husks and add a bitter powderiness to the beer’s aftertaste. After the wort rests between 170℉ and 180℉ for at least ten minutes we can drain the first fifth of the wort into a separate vessel. Afterwards, the remaining wort is drained off into another container. Once the mash tun is emptied, it is wise to circulate the bottom fifth of wort several times through the grains. The bottom layer of mash accumulates large precipitates; circulating through the grain bed utilizes the grains as a natural filter and strips out any particles that could reduce clarity in our beer.
After the wort begins to come out clear we do what is called a grain sparge. Sparging rinses the grains of any desirable sugars and compounds left behind in the grain. We will utilize about a gallon of 180℉ water and will sparge in a manner similar to how we filtered the bottom layer of the wort. There are various ways in which we can sparge; however it ultimately depends on personal preference and equipment.
Once our wort and sparge water are combined, we can continue like with any other batch, extract or all grain. We boil, add hops, chill the wort, pitch the yeast and throw it in the fermenter… then we wait. Remember, take notes and keep records!

Leave a Reply