A successful clone can be one of the most rewarding experiences for a grower. Essentially, a gardener-turned-cloner steps into the triad role of surgeon, scientist, and anal retentive clean freak. Preparation is key (consult, “A Cut Above: Act I” for cloning mise en place) as well as a sanitary environment.
Ready?
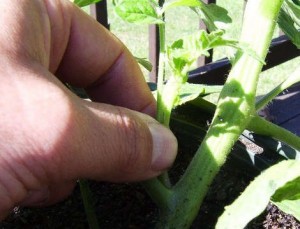
1) Once the prized plant has been selected, take a sharp clean blade and make a 45 degree cut across branches two to four inches long. Before putting the clone into the grow medium, make sure there are two sets of leaves above ground and one to two sets of trimmed nodes below ground. In order for the plant to put its energy back into growing roots, trim back any big leaves (by at least half) on the cutting. This keeps the clone from concentrating its energy all on one big leaf.

Store all your cuttings into a glass of water until ready to make the transition to the root cubes.
2) Soak your root cubes (i.e. Sunleaves Starter plugs, Grodan rockwool, etc.) in a diluted seaweed solution (Nitrozyme works wonders) with water, and if you’re feeling frisky, add a mycorrhizae inoculant (for all its benefits, consult here). Make sure your grow media is thoroughly wet, but not overly saturated. Rockwool is especially notorious for being on the drenched side.
3) Take a dull pencil or one of the numerous chopsticks that hide all over the kitchen (if you live in Asheville, this is especially true) and make a nice hole in the root medium. Or, take a sharp knife and cut open the cube to where the hands can pry it halfway open. Both methods allow the cutting to be placed in the medium without damaging the stem or wiping off the rooting hormone.
4) Dip each cutting into the desired rooting hormone (consult Act I for varieties), and swirl it around for 15 seconds. Place stem carefully into root cube and repeat until done. Then, place your media upright in something like a 72 cell tray (which are also good for seed starting mixes if root cubes aren’t preferred) with a flat tray underneath to catch excess water.
Finally, add the Humidome and then vent to give the cuttings some breathing room. The humidity is necessary at first since the cuttings need to be moist 100% of the time.
5) Optimally, place the domes under 18 hours of flourescent light. T-5 lighting is an excellent choice not only for its low heat (and minimal electric bills) but also its full spectrum capabilities (Dig It will cover the intricate world of lighting in the next week). Also, make sure to spray the cuttings several times a day with a fine mist to ensure moisture is a constant companion.
If cold is an issue in the home, use a heating mat (with a towel over it) to raise the surface temp.
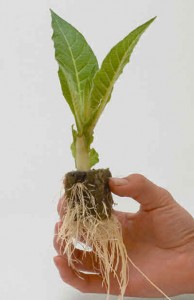
In a week, there should be signs of healthy white roots popping out of the grow media. Don’t let the cuttings get too comfy! It’s time to transplant.


Leave a Reply